MANUAL


login via www.cleancompound.com/wp-admin

username and password provided

password is case sensitive

EDITING FRONT PAGE


navigate to Pages > All Pages

click on HOME to edit


THE BANNER

  1. scroll down and find ADD BANNER button, click here to insert banner item
  2. Click ADD IMAGE to insert image, a pop up will appear where you can drag and drop the image to this window, make sure the height or width does not exceed 2500px, and file size under 1mb. wait until uploaded, make sure there is blue tick on the top right, then click select
  3. this is the add link button, if you have no text and want to link the banner to a page. a pop up will appear where you can choose existing page within your website, or copy and paste URL.
  4. this is where you enter the caption, and you can also insert link by highlighting a word, then click the CHAIN icon, the same pop up as #3 will appear and the process is the same. use OPEN LINK IN NEW TAB if you want them to open a new window.
    1. NOTE: it is advisable to choose one or the other, e.g Link on the image only, or in the caption only.
  5. This is the option to vertically align the caption, default is top
  6. this is the option to horizontally align the caption, default is left

final result should be how it is displayed on the previous items


THE CONTENT

scroll down until you see ADD CONTENT button. click and choose the type of content. mostly we will be using either one or multi column contents

Multi Column

this is where the content is displayed side by side between Image and Text. for this purpose item 5, 6, and 7 can be left blank since the caption would almost always appears in the text content.

  1. select content type, you can choose IMAGE to appear first or TEXT
  2. click ADD IMAGE button to insert image, the process is the same as above in home page instruction
  3. click ADD LINK if you would like to link the image, however we have designed that all the information and links are appearing in the text content.
  4. column size choose 1/2 so that it appear as half of the page
  5. caption for the image – we will leave this blank
  6. vertical alignment – we will leave this as is
  7. horizontal alignment – we will leave this as is
  8. there we choose TEXT if the first one is IMAGE
  9. this is the text content, where information you want to show are being entered. you can also insert link by highlighting a word, choose the CHAIN icon and the pop up will appear. process are outlined in the homepage section.
  10. column size should be 1/2 to match the first content
  11. text vertical align – default is bottom
  12. text horizontal align – default is left


ONE COLUMN

one column is a simpler version of multi column. in this section you can only choose either Text or Image content. for design and layout purpose we have chose to use image with captions overlaid over it.

  1. content type selected as IMAGE
  2. click ADD IMAGE to insert the image – process outlined above
  3. enter url so that its clickable – process outlined above
  4. enter captions, this is also where you can link by highlighting a word and inserting URL – process outlined above
  5. caption vertical align – default is top
  6. caption horizontal align – default is left


SPOTLIGHT

spotlight is a collection of images of a selected brand, with their bio and link to their products

  1. scroll down and click ADD IMAGE to insert a row
  2. click ADD IMAGE button to insert an image, process as above
  3. click ADD LINK to insert url – process as above
  4. this is the description of the brand, you can also insert link by highlighting and inserting URL
  5. caption vertical align – default is bottom
  6. caption horizontal align – default is left

once all the changes are made, ensure to press UPDATE on the top right to save your changes

GENERIC PAGES

This instructions applies across the following pages:

  • About
  • Our Space
  • Our Brands
  • Contact
  • FAQ
  • Privacy Policy
  • Terms and Conditions
  • Terms of Service
  1. Click ADD ROW to insert new content area
  2. insert the title of the section
  3. insert the description
  4. click ADD IMAGE to insert image related to this section – process outlined above

Our space and our brands will all be displayed under ABOUT page in the front end, the order is OUR SPACE, ABOUT and OUR BRANDS

once all the changes are made, ensure to press UPDATE on the top right to save your changes

THE BRANDS

to add new brands :

  1. click ADD ROW to insert new row
  2. Enter the brand name
  3. enter description for the brand
  4. enter philosophy
  5. enter ingredients
  6. enter the earth
  7. link the brand by selecting from the drop down – they will need to be added as product category first
  8. click ADD IMAGE to insert image
  9. as above

once all the changes are made, ensure to press UPDATE on the top right to save your changes

Ticker and Footer Recognition

the menu to these areas are on the left hand side as highlighted, to make changes type in any text in the text field and ensure to click update once done

Menu Items

Navigate to Appearance – Menus

there are a handful of menus running on the website, the main ones that may need changes are menu-left, footer-left, footer-right, mobile menu

note: we have designed and coded the menus to appear the way they are. any changes that affects layout will require redesign and modification on the codes


The highlighted area on the left are the items that can be inserted into the menus, as well as creating custom links (we will go through this here)

To edit, choose the menu you want to edit in the drop down and click select.

MENU LEFT is the primary menu

When you add an item you can expand it and edit its properties such as displayed text, and target.

the sub menu are created using a plugin which can automatically add the sub menus based on the product categories. for example Face. the displayed text can be anything here as it wont be shown.

ensure JC SUB MENU is ticked

ensure replace current item with populated items is ticked

choose product_cat as taxonomy

choose the desired terms

and leave everything else as is.

MAKE SURE THE SUB MENU ARE TUCKED UNDER ITS HEADING MENU, AND SECOND-LEVEL IS ADDED AS CSS CLASS ON THE HEADING MENU – see: Face, Body structure

(IF YOU CANT SEE CSS CLASS, CLICK ON SCREEN OPTIONS ON TOP RIGHT, AND TICK CSS CLASSES)

custom links are for the links that arent on the website e.g instagram.

select custom links from the left hand side, paste the URL, tick OPEN IN NEW TAB and enter the display text.

if any changes are made to MENU LEFT, ensure to make the reflected changes also in MOBILE MENU

MAKE SURE TO PRESS SAVE AFTER MAKING ANY CHANGES

Product Categories and Attributes

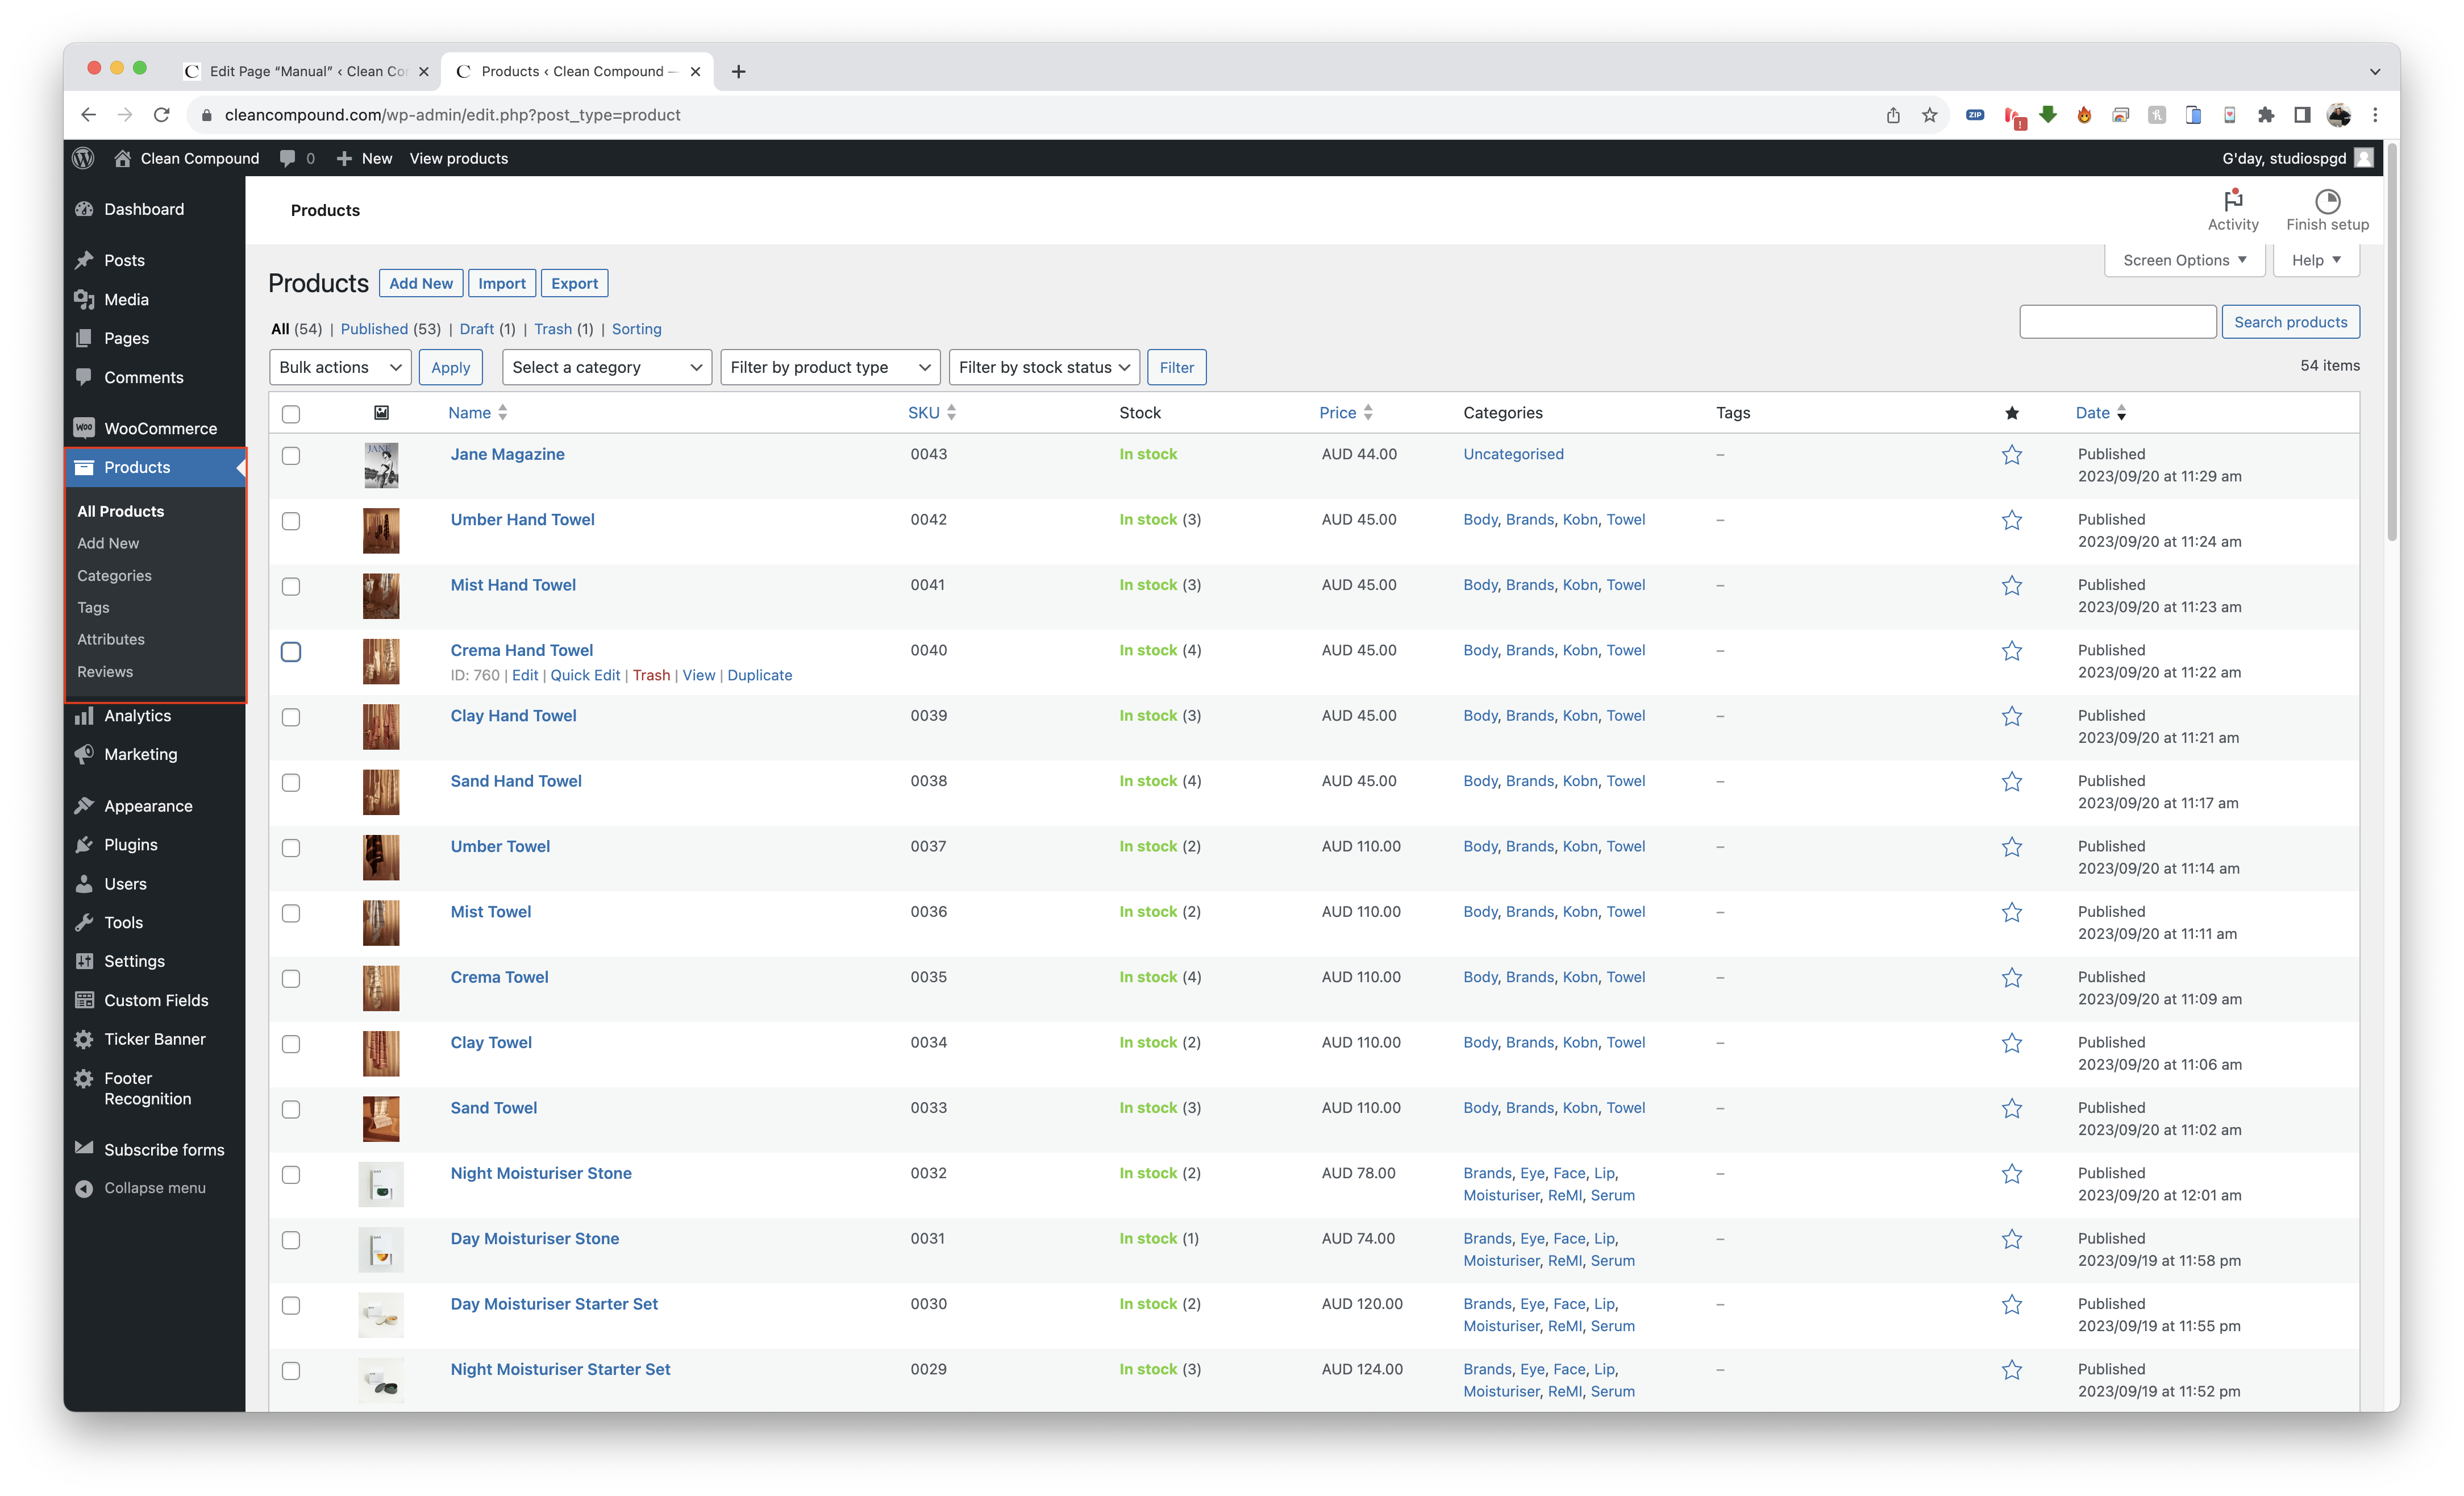
To access the menu for categories and attributes navigate to Products. it will open sub menu as highlighted

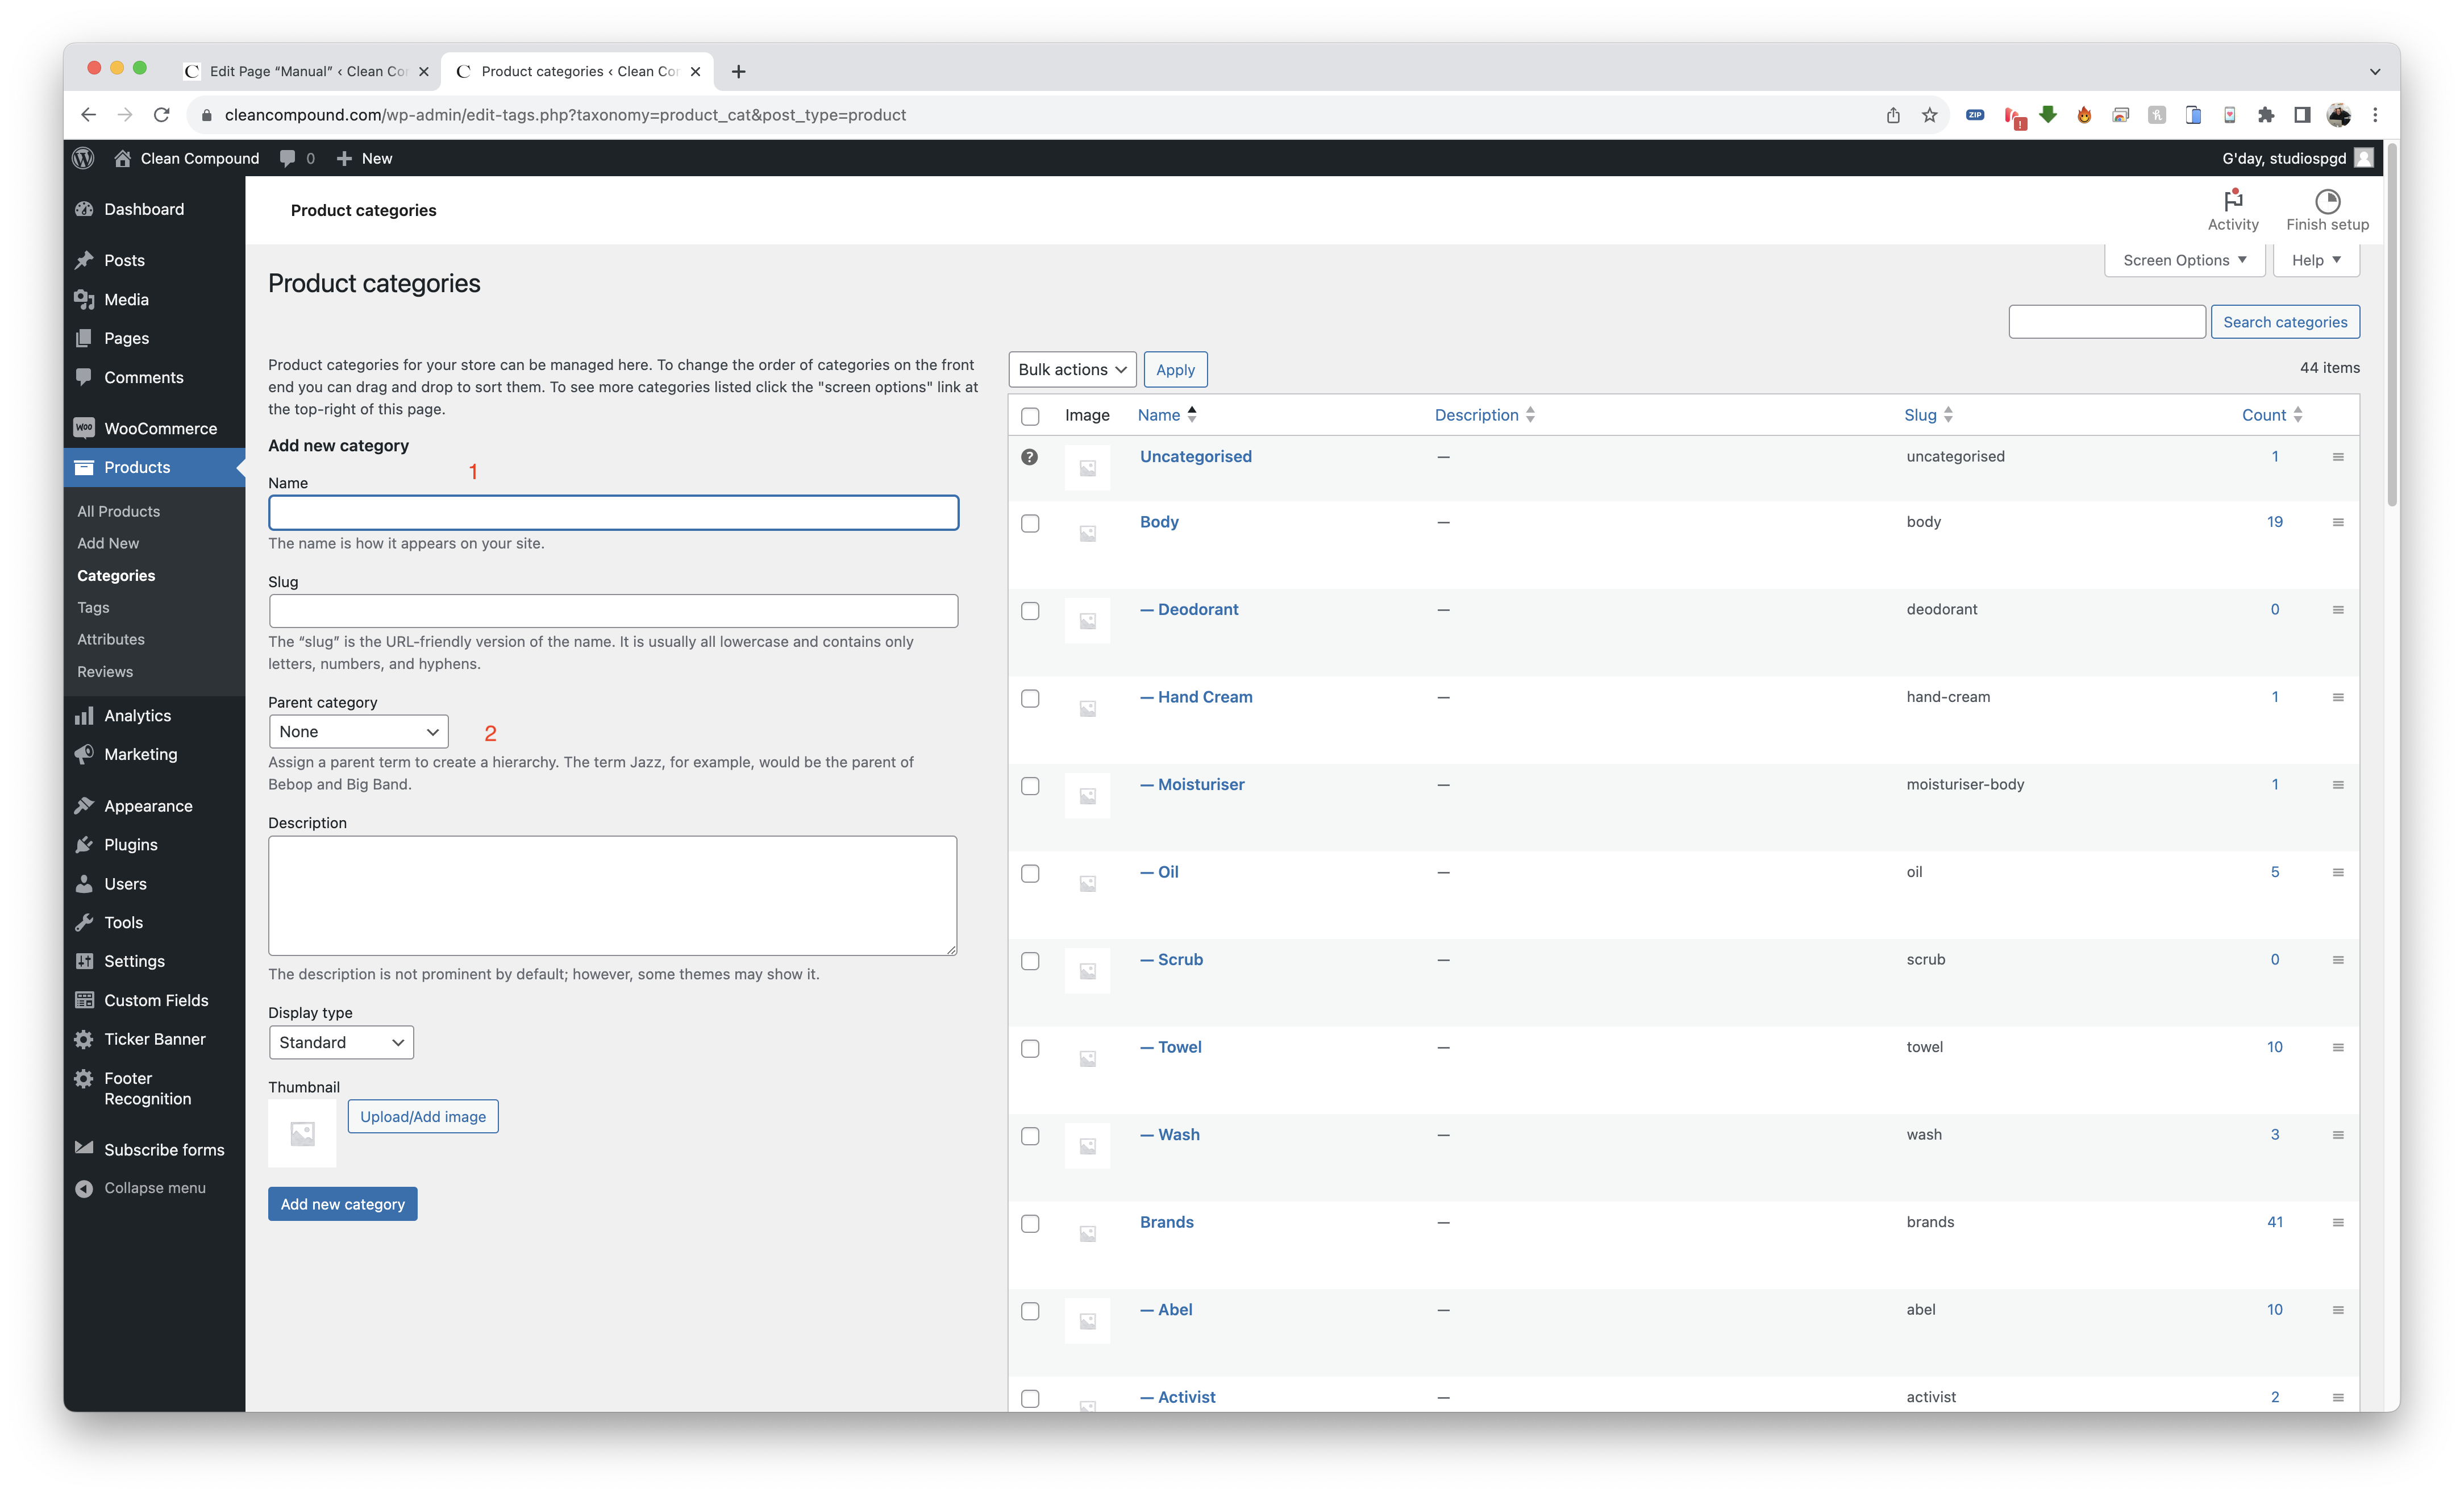
CATEGORIES

this is where you add product categories before you can assign the product.

  1. enter the category name
  2. if its a child category, select the parent category from the dropdown. if its not available, you may need to create the parent category first, then create the child category.
  3. click ADD NEW CATEGORY

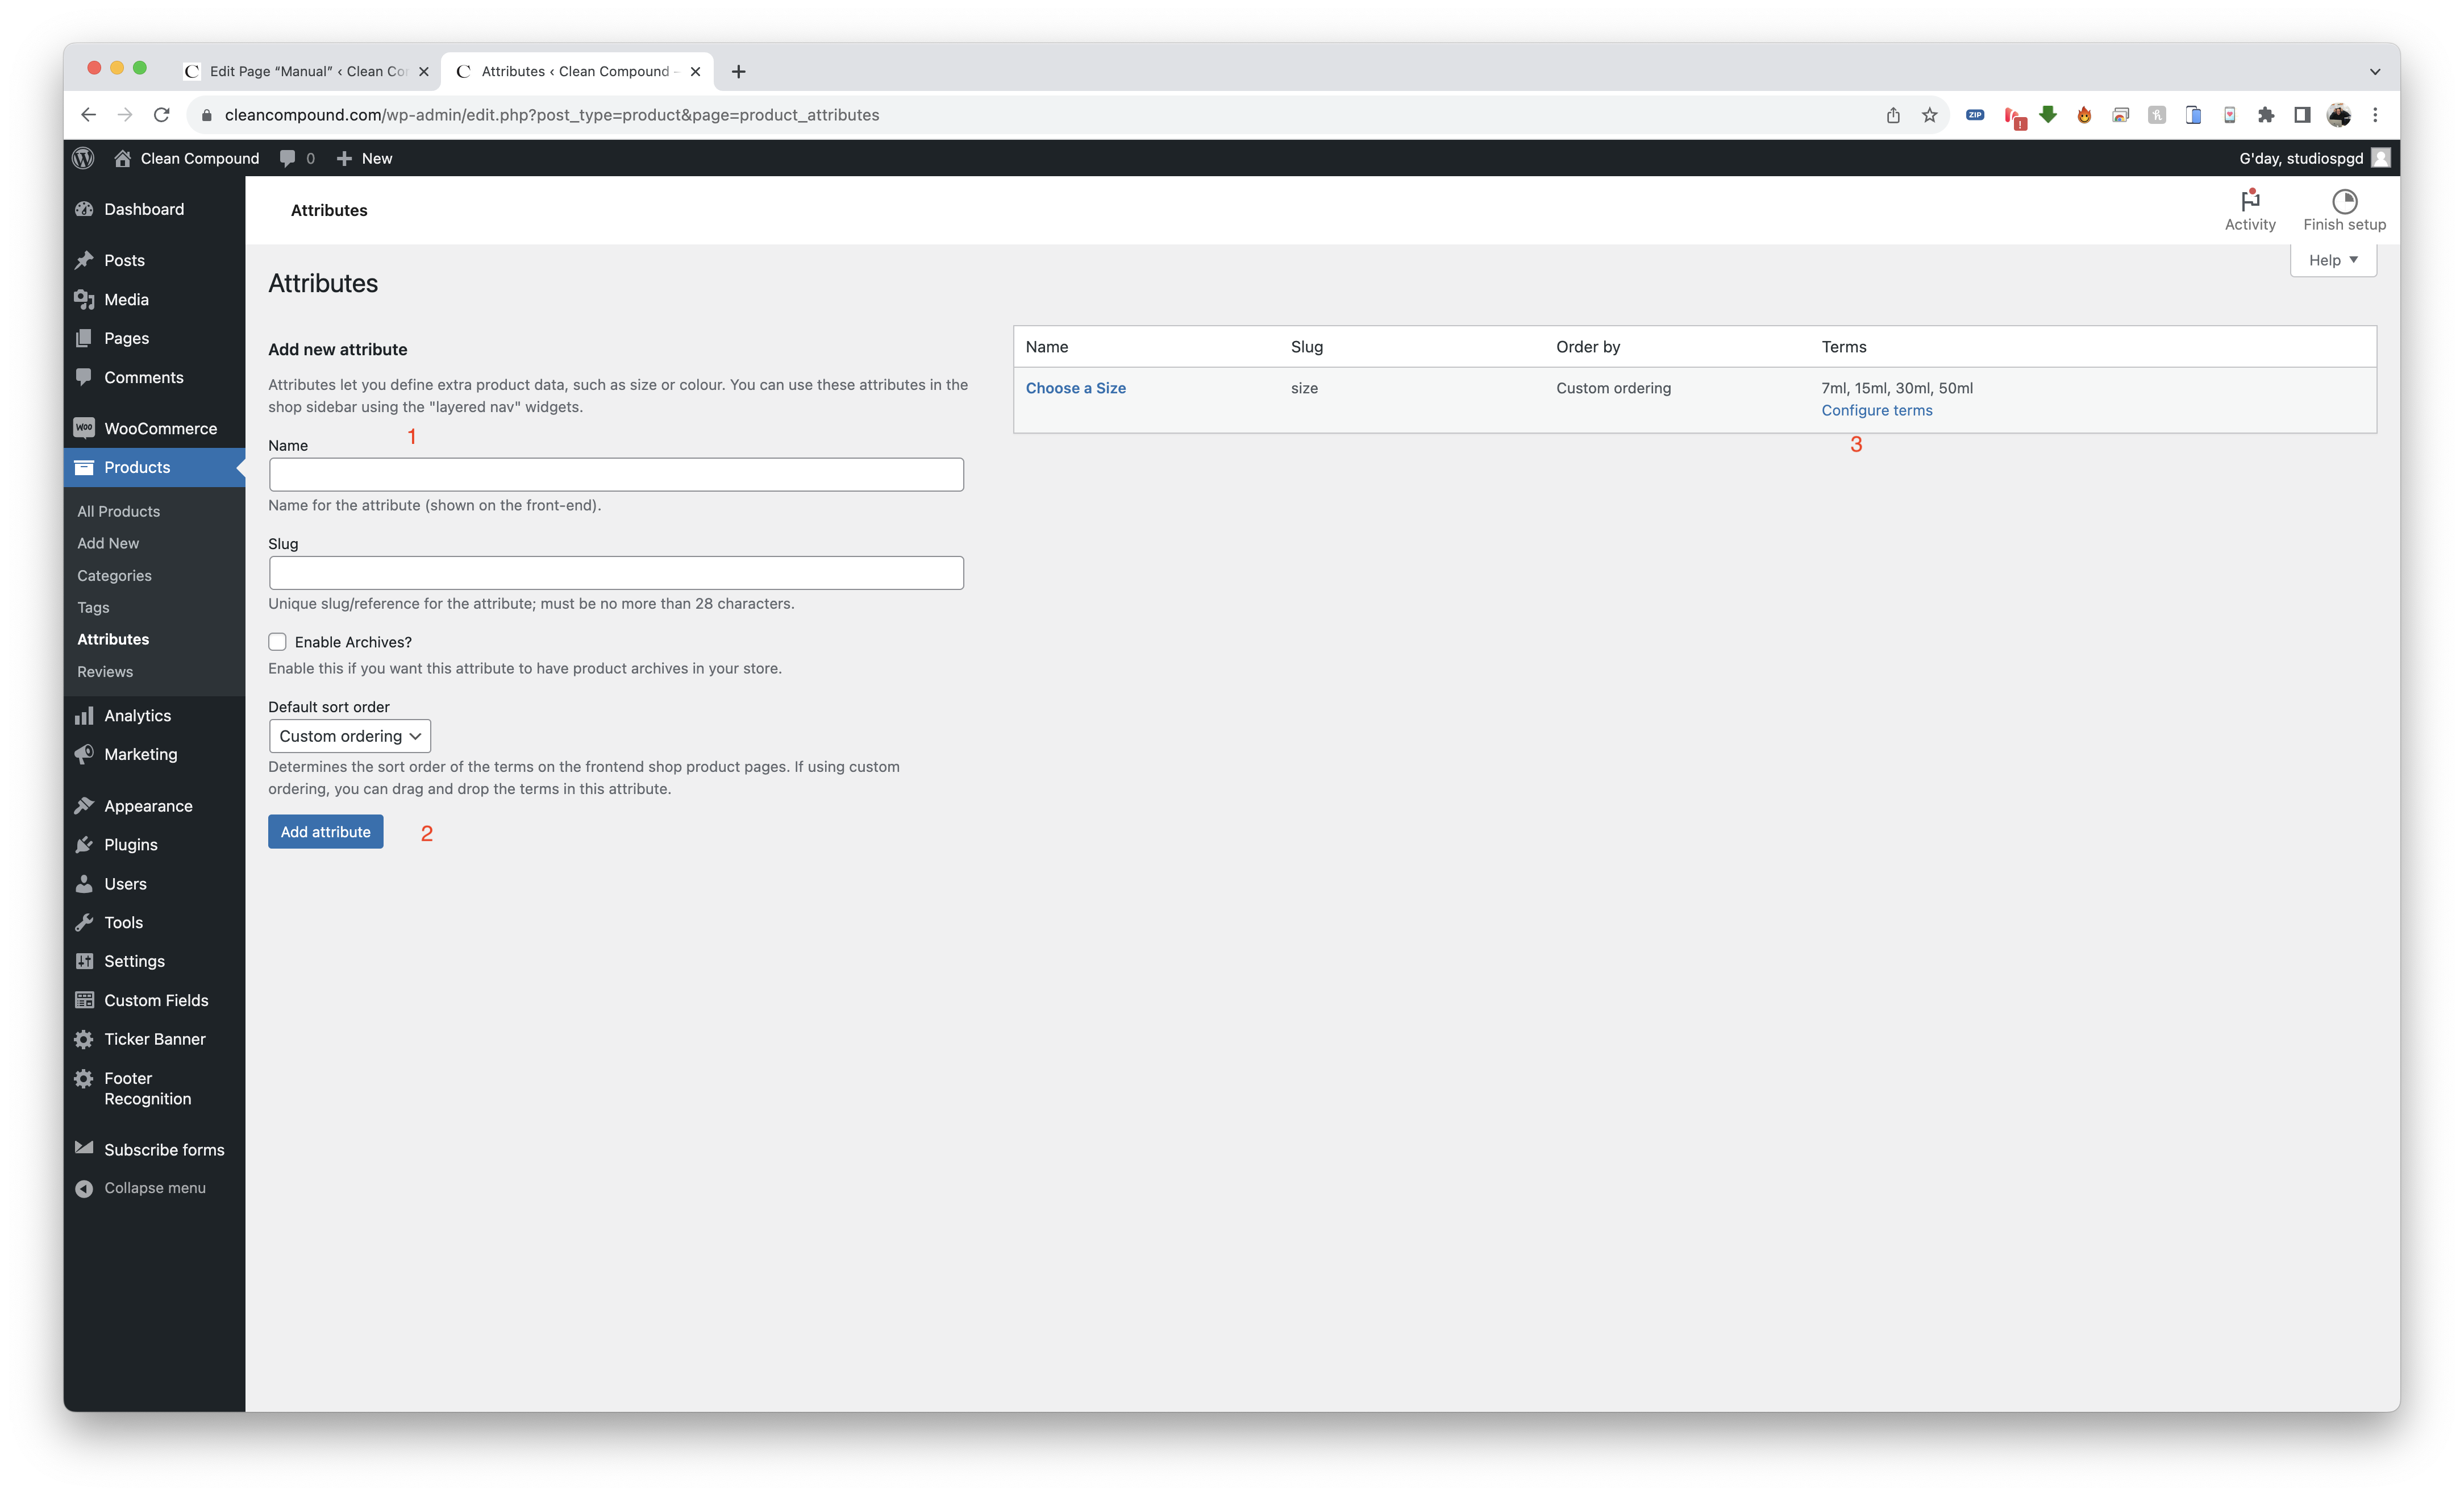
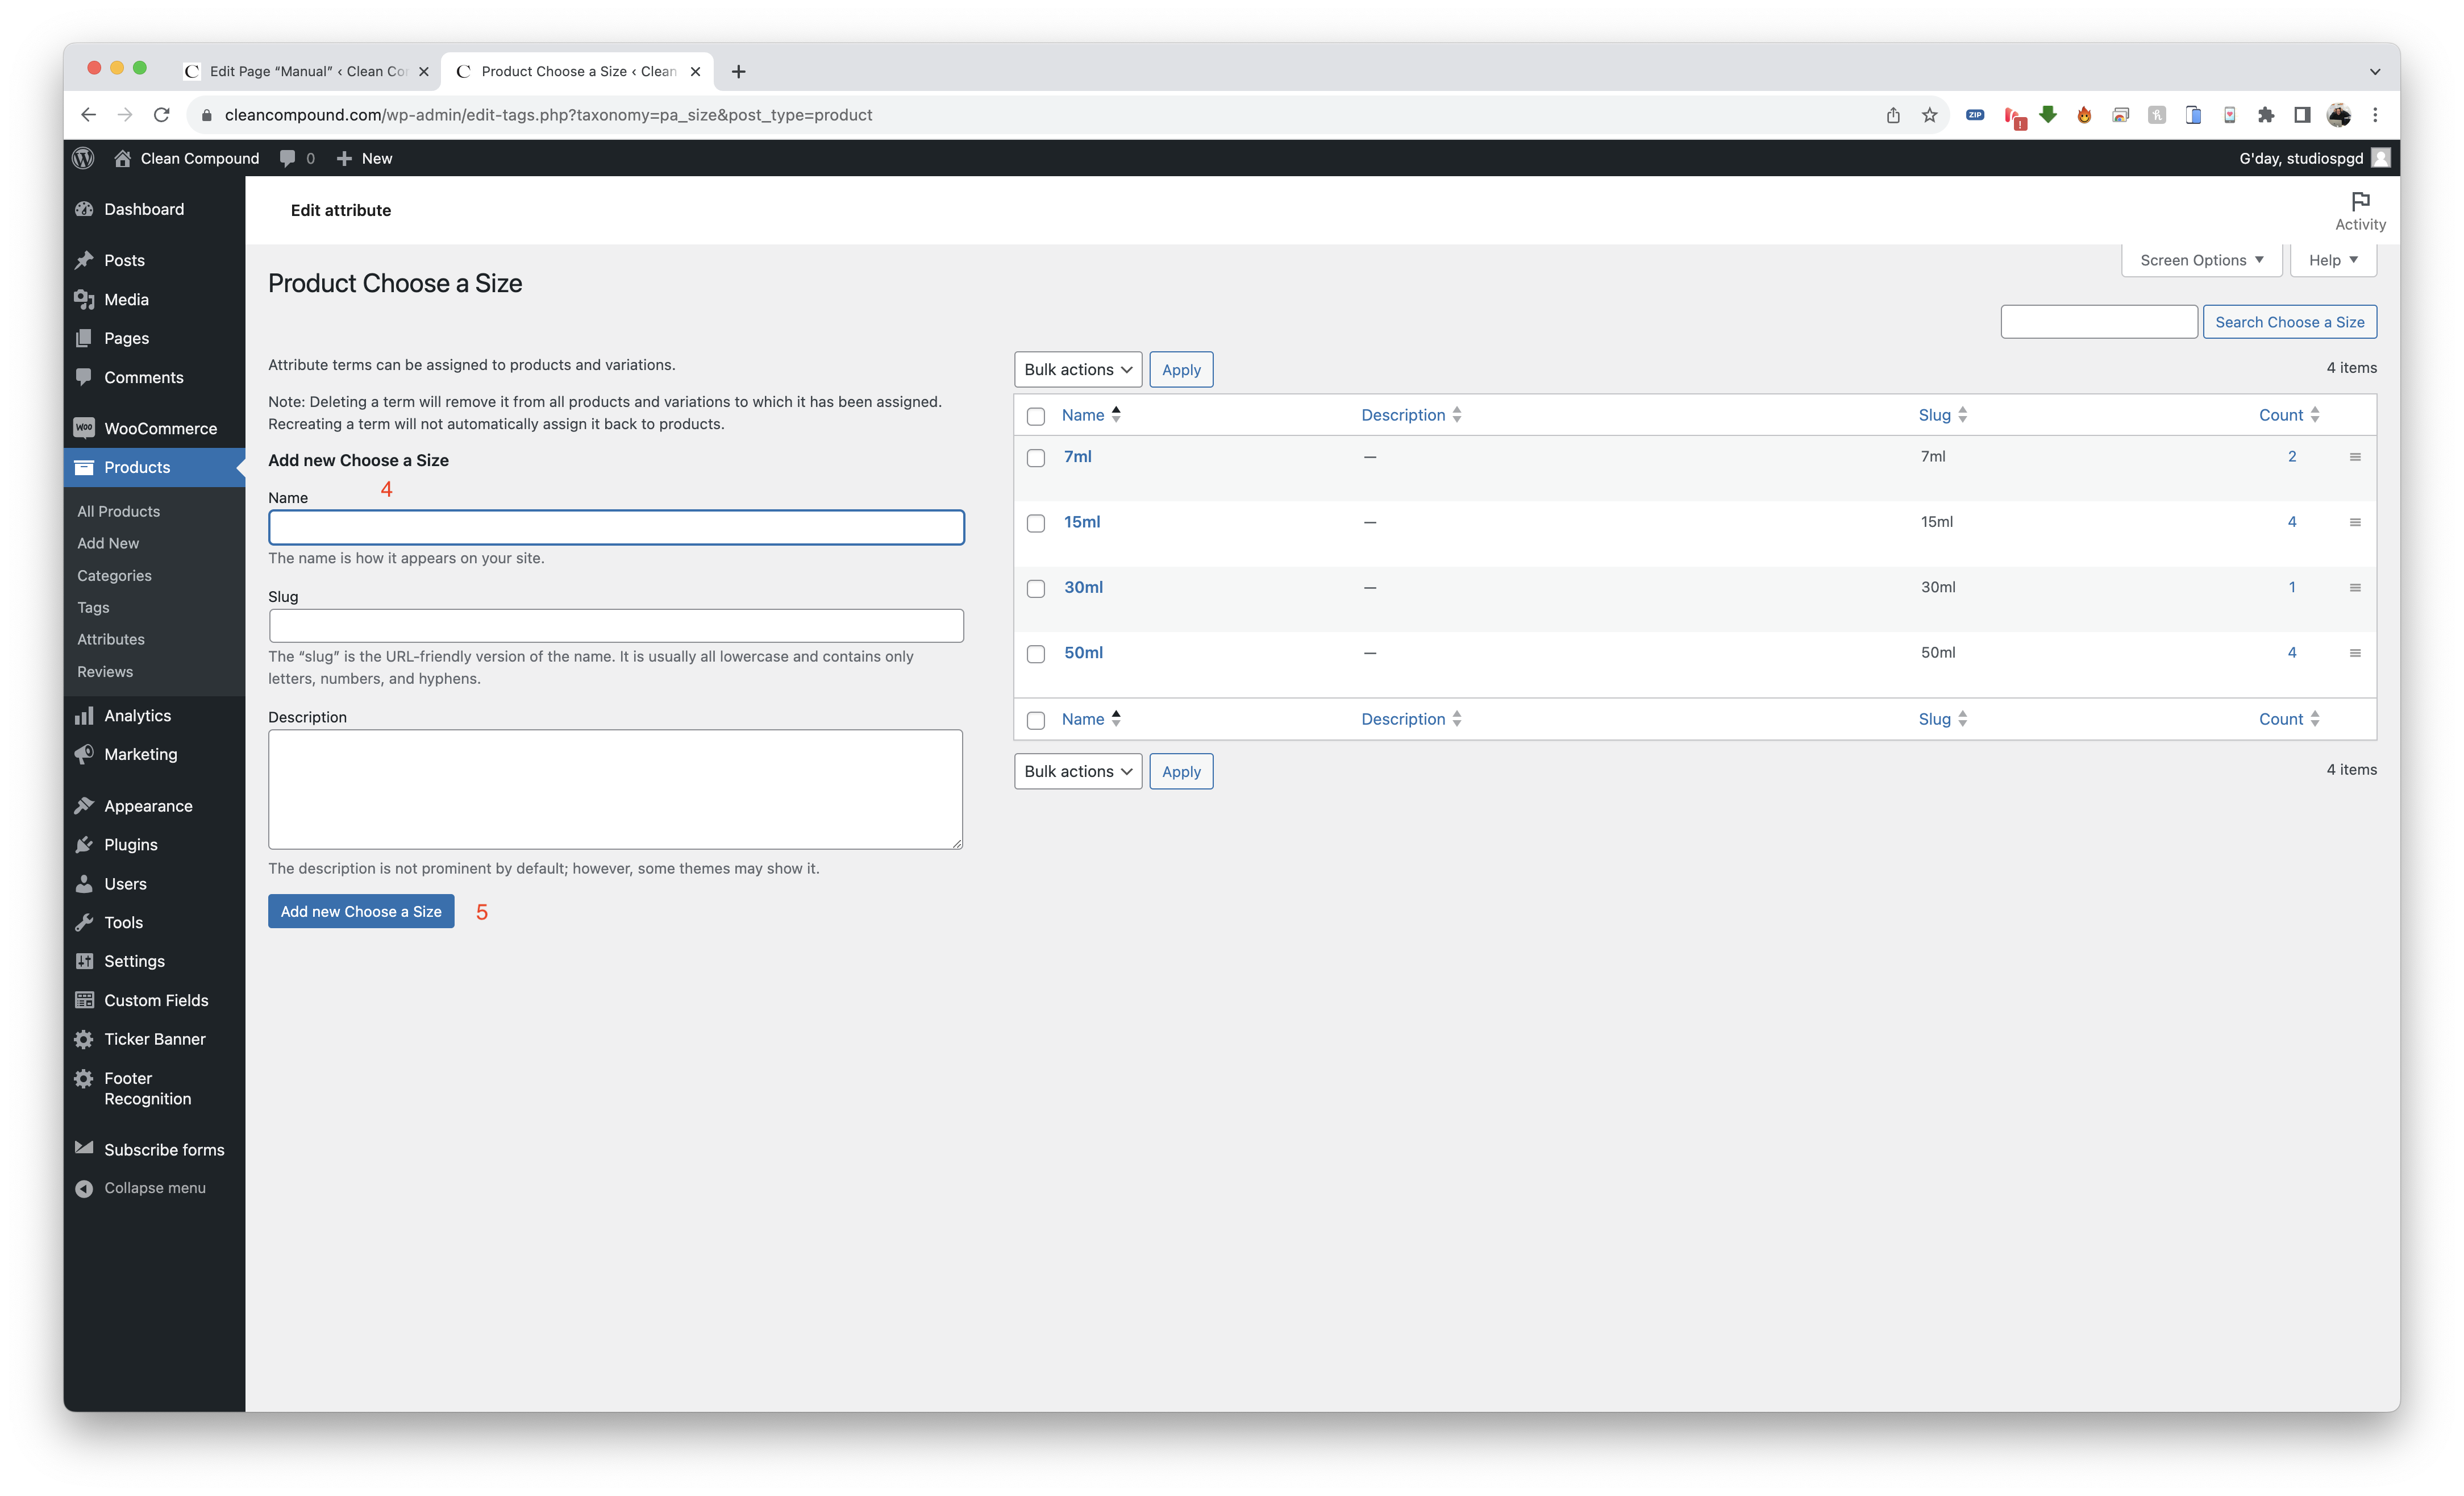
ATTRIBUTES

this is how variable products gets their variations. you need to create the attributes first before creating variable products.


  1. enter attributes name – we have added one and if possible follow naming convention e.g choose enclosure
  2. click ADD ATTRIBUTES
  3. once saved you will be able to configure terms – this is where you enter the selection e.g 50ml

save the terms

SIMPLE PRODUCT

To add new simple product click Products > ADD NEW

  1. enter the product name and description
  2. click add product image – process as outlined in previous sections
  3. select the product category – the category will have to be existing before you can choose
  4. add the hover image
  5. then add content for the rest of the media on the product page
  6. you can choose image or text – if image, add the image – process outlined as above
  7. if video, click add file, upload the video file and insert it – note: keep the sizing down to under 10mb to preserve bandwidth and website speed
  8. enter how to use – these fields if left empty it wont show up in the front end
  9. enter skin type – these fields if left empty it wont show up in the front end
  10. enter key benefits – – these fields if left empty it wont show up in the front end
  11. enter key ingredients – – these fields if left empty it wont show up in the front end
  12. enter ingredients – – these fields if left empty it wont show up in the front end
  13. select the products it pairs well with by choosing from the left column
  14. in product data leave it as simple product
  15. enter the price
  16. ensure this is ticked if it needs to be synced to SQUARE
  17. in the inventory tab, enter the SKU

once done click publish or update on top right

VARIABLE PRODUCT

The steps from simple product from #1 – #14 applies here too. the difference will be in the product data

  1. select Variable Product
  2. go to attributes tab
  3. from the dropdown select the correct attributes you would like to add, you can have multiple attributes, it will need to be created prior to assigning.
  4. ensure visible on product page and used for variations are ticked
  5. select the attribute terms you would like to add – save it
  6. go to variations tab
  7. generate all variations
  8. you can add image here that will swap with the main product image in the product page when the attributes is selected on the front end of the website
  9. enter the SKU
  10. enter the price

repeat step 8-10 for all variations generated

CLICK PUBLISH OR UPDATE ONCE DONE ON TOP RIGHT

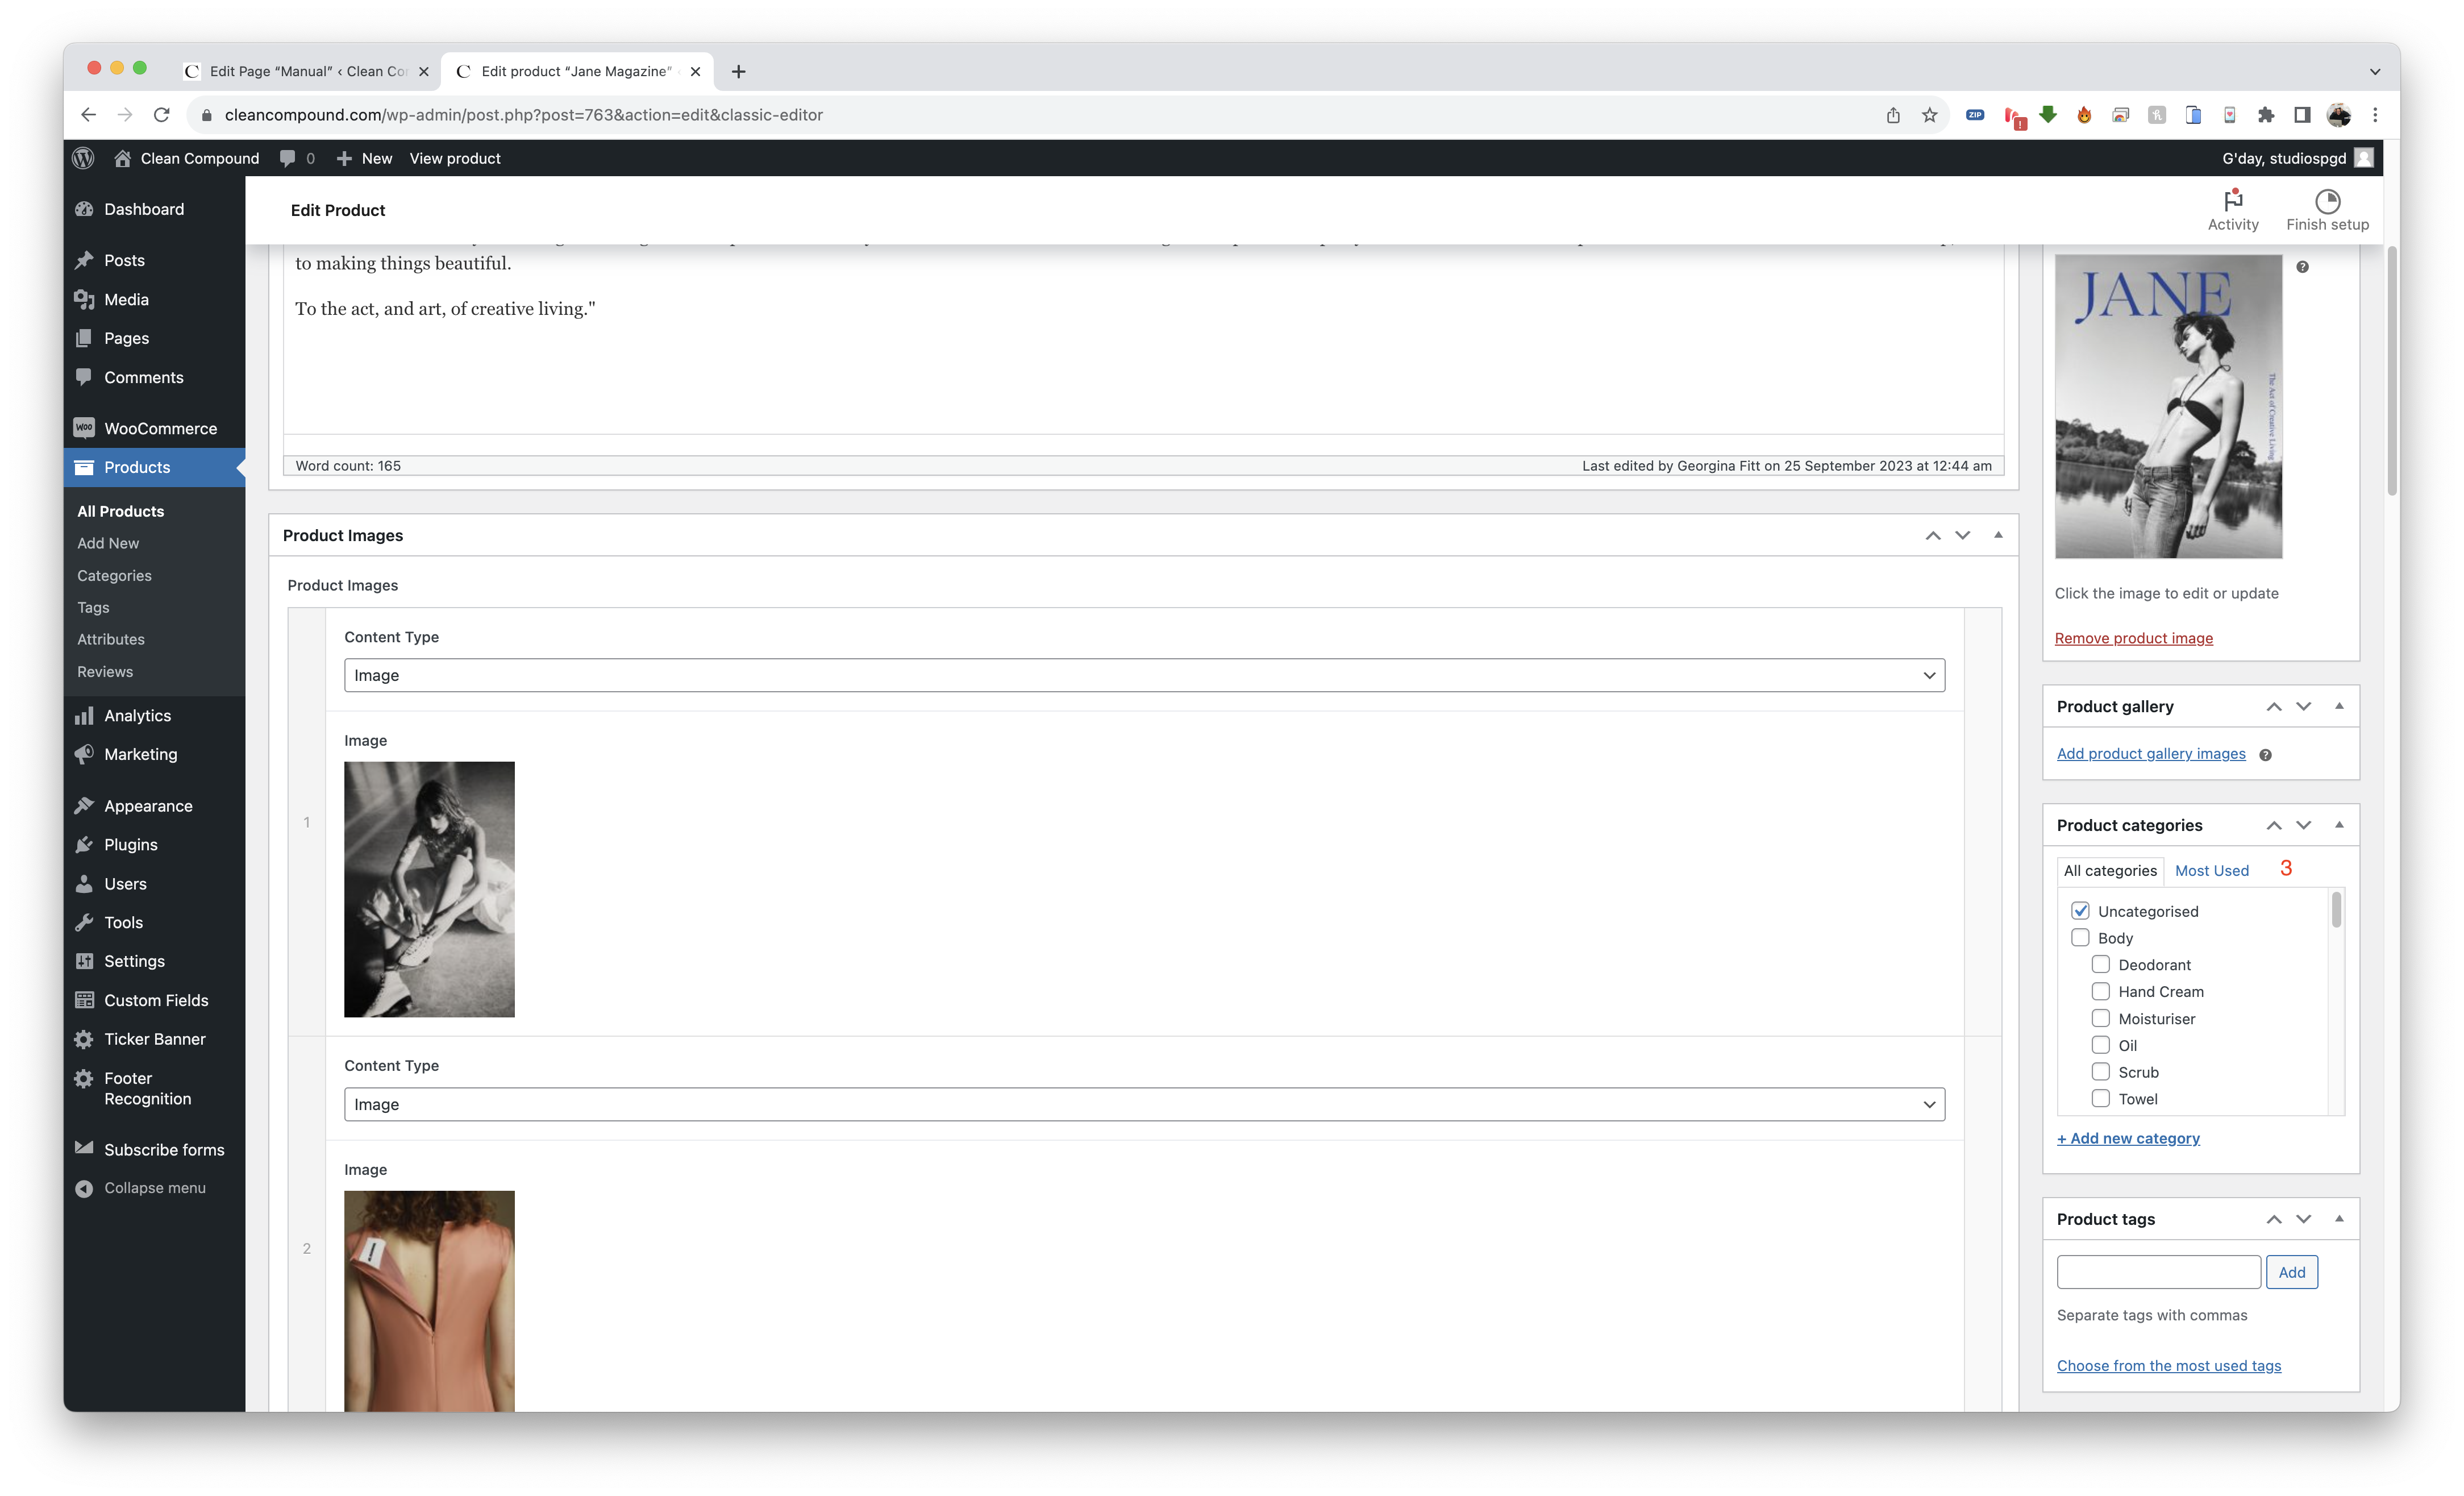
NEW addition: inserting product brand in product page

under the title there will be a drop down where you can choose which brand is the product belong to, and can be displayed in the product page, visitor can click this to be taken to the brand page as well.

to add this, just simply select the product in the drop down in the PRODUCT BRAND section in the back end as per screenshot.

ORDER PROCESSING

By default all new orders will show up as PROCESSING. this is so that shop owner have full control whether the sale is final or not. to change this status navigate to WOOCOMMERCE – ORDERS

enter the order

  1. in this dropdown you can change the order status to completed if you have processed the order e.g pick the product and put it aside / packed
  2. you can also process refunds from this screen
  3. any changes made ensure to click UPDATE so that it reflects in the system and sends the right notifications to the customers.

Shipping Method

To update shipping, navigate to WOOCOMMERCE – SETTINGS – SHIPPING tab

there are two zones we have created for the shipping: AUS and LOCAL.

Local is for victoria only, while AUS covers the rest of Australia

  1. select the zone you would like to edit. australia standard method is applicable to both Local and AUS zones.
  2. find Australia Standard, click EDIT
  3. in the cost field enter the updated cost
  4. click SAVE CHANGES on both the pop up and on the page

To add free shipping, follow the steps below:

  1. select the zone you would like to include free shipping
  2. click ADD SHIPPING METHOD
  3. select FREE SHIPPING from the drop down
  4. click ADD METHOD
  5. once added click EDIT under free shipping
  6. on the FREE SHIPPING REQUIRES section choose your prerequisite of free shipping – most of the time its minimum spend OR coupon code
  7. enter the amount of minimum spending. for the coupon it will need to be edited in the coupon page
  8. tick Apply minimum order rule before coupon discount
  9. SAVE CHANGES