pre-order crushes mothers day flowers + Abel mini fragrance 10th may in store
pre-order crushes mothers day flowers + Abel mini fragrance 10th may in store
pre-order crushes mothers day flowers + Abel mini fragrance 10th may in store
pre-order crushes mothers day flowers + Abel mini fragrance 10th may in store
pre-order crushes mothers day flowers + Abel mini fragrance 10th may in store
pre-order crushes mothers day flowers + Abel mini fragrance 10th may in store
MANUAL
|
|
 |
login via www.cleancompound.com/wp-admin
username and password provided password is case sensitive |
EDITING FRONT PAGE |
|


|
navigate to Pages > All Pages
click on HOME to edit
THE BANNER
final result should be how it is displayed on the previous items
THE CONTENT scroll down until you see ADD CONTENT button. click and choose the type of content. mostly we will be using either one or multi column contents Multi Column this is where the content is displayed side by side between Image and Text. for this purpose item 5, 6, and 7 can be left blank since the caption would almost always appears in the text content.
ONE COLUMN one column is a simpler version of multi column. in this section you can only choose either Text or Image content. for design and layout purpose we have chose to use image with captions overlaid over it.
SPOTLIGHT spotlight is a collection of images of a selected brand, with their bio and link to their products
once all the changes are made, ensure to press UPDATE on the top right to save your changes |
GENERIC PAGES |
|
 |
This instructions applies across the following pages:
Our space and our brands will all be displayed under ABOUT page in the front end, the order is OUR SPACE, ABOUT and OUR BRANDS once all the changes are made, ensure to press UPDATE on the top right to save your changes |
THE BRANDS |
|
   |
to add new brands :
once all the changes are made, ensure to press UPDATE on the top right to save your changes |
Ticker and Footer Recognition |
|
  |
the menu to these areas are on the left hand side as highlighted, to make changes type in any text in the text field and ensure to click update once done |
Menu Items |
|
       |
Navigate to Appearance – Menus
there are a handful of menus running on the website, the main ones that may need changes are menu-left, footer-left, footer-right, mobile menu note: we have designed and coded the menus to appear the way they are. any changes that affects layout will require redesign and modification on the codes
The highlighted area on the left are the items that can be inserted into the menus, as well as creating custom links (we will go through this here) To edit, choose the menu you want to edit in the drop down and click select. MENU LEFT is the primary menu When you add an item you can expand it and edit its properties such as displayed text, and target. the sub menu are created using a plugin which can automatically add the sub menus based on the product categories. for example Face. the displayed text can be anything here as it wont be shown. ensure JC SUB MENU is ticked ensure replace current item with populated items is ticked choose product_cat as taxonomy choose the desired terms and leave everything else as is. MAKE SURE THE SUB MENU ARE TUCKED UNDER ITS HEADING MENU, AND SECOND-LEVEL IS ADDED AS CSS CLASS ON THE HEADING MENU – see: Face, Body structure (IF YOU CANT SEE CSS CLASS, CLICK ON SCREEN OPTIONS ON TOP RIGHT, AND TICK CSS CLASSES) custom links are for the links that arent on the website e.g instagram. select custom links from the left hand side, paste the URL, tick OPEN IN NEW TAB and enter the display text. if any changes are made to MENU LEFT, ensure to make the reflected changes also in MOBILE MENU MAKE SURE TO PRESS SAVE AFTER MAKING ANY CHANGES |
Product Categories and Attributes |
|
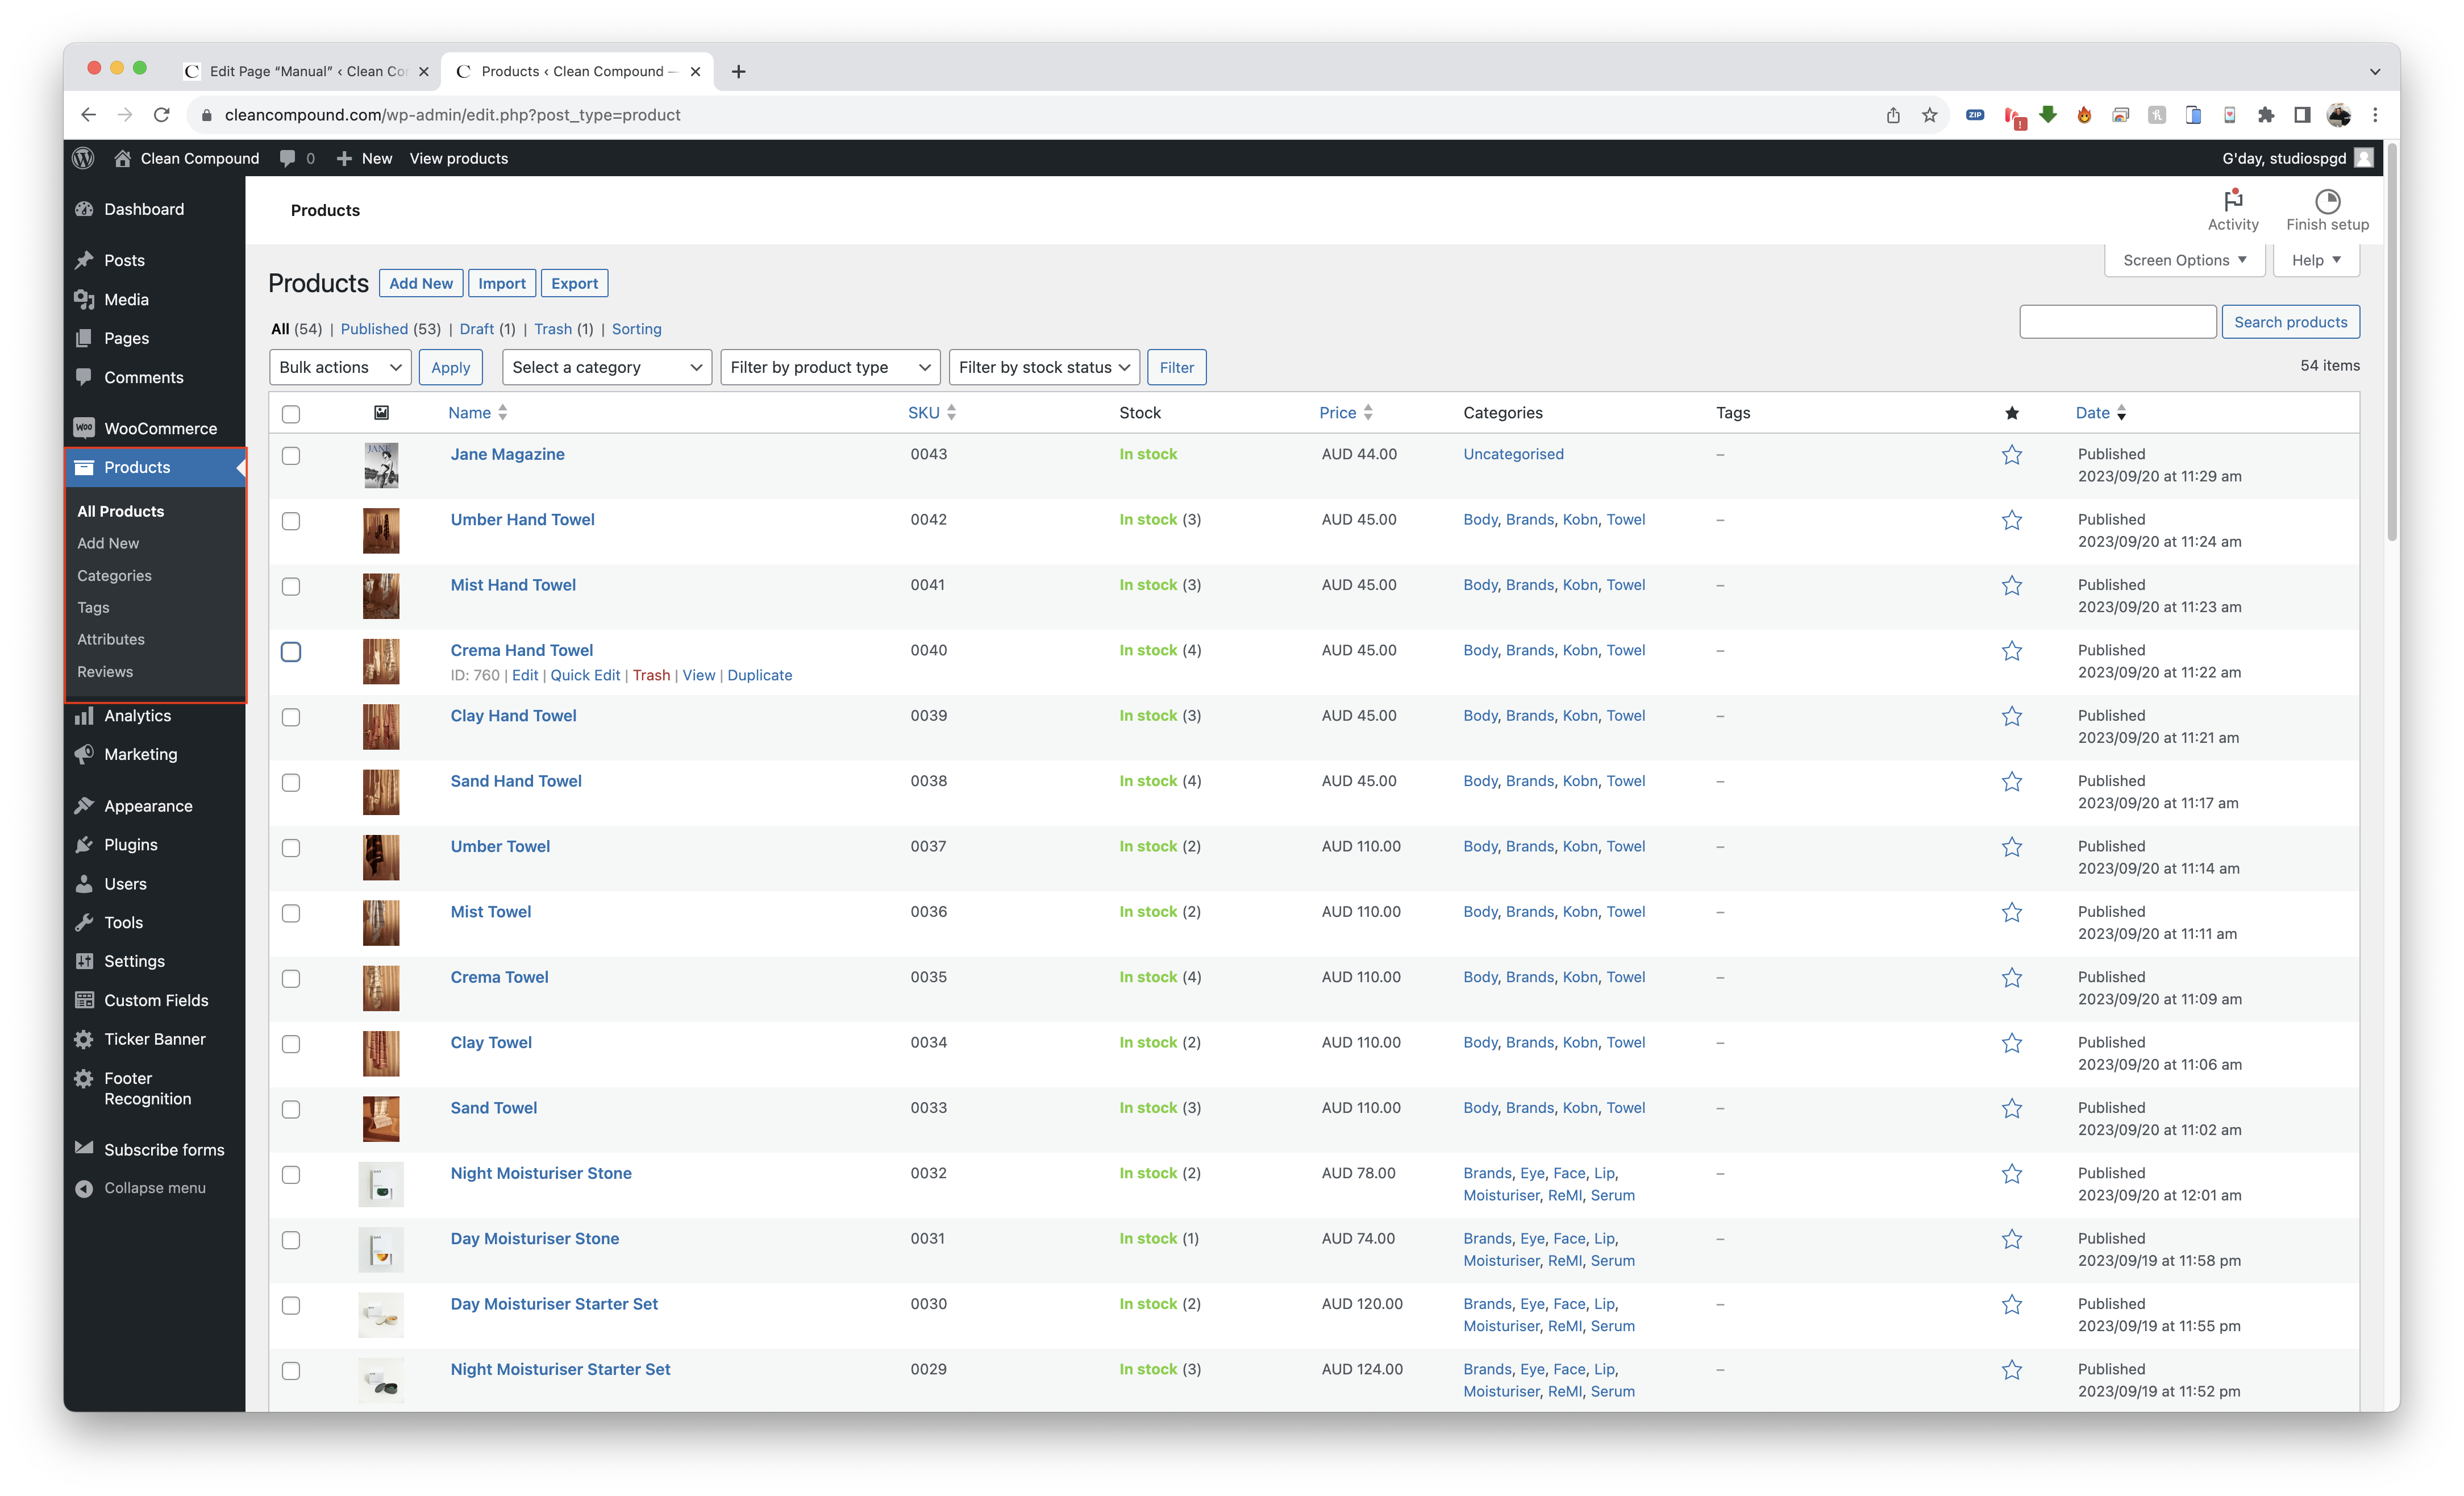    |
To access the menu for categories and attributes navigate to Products. it will open sub menu as highlighted
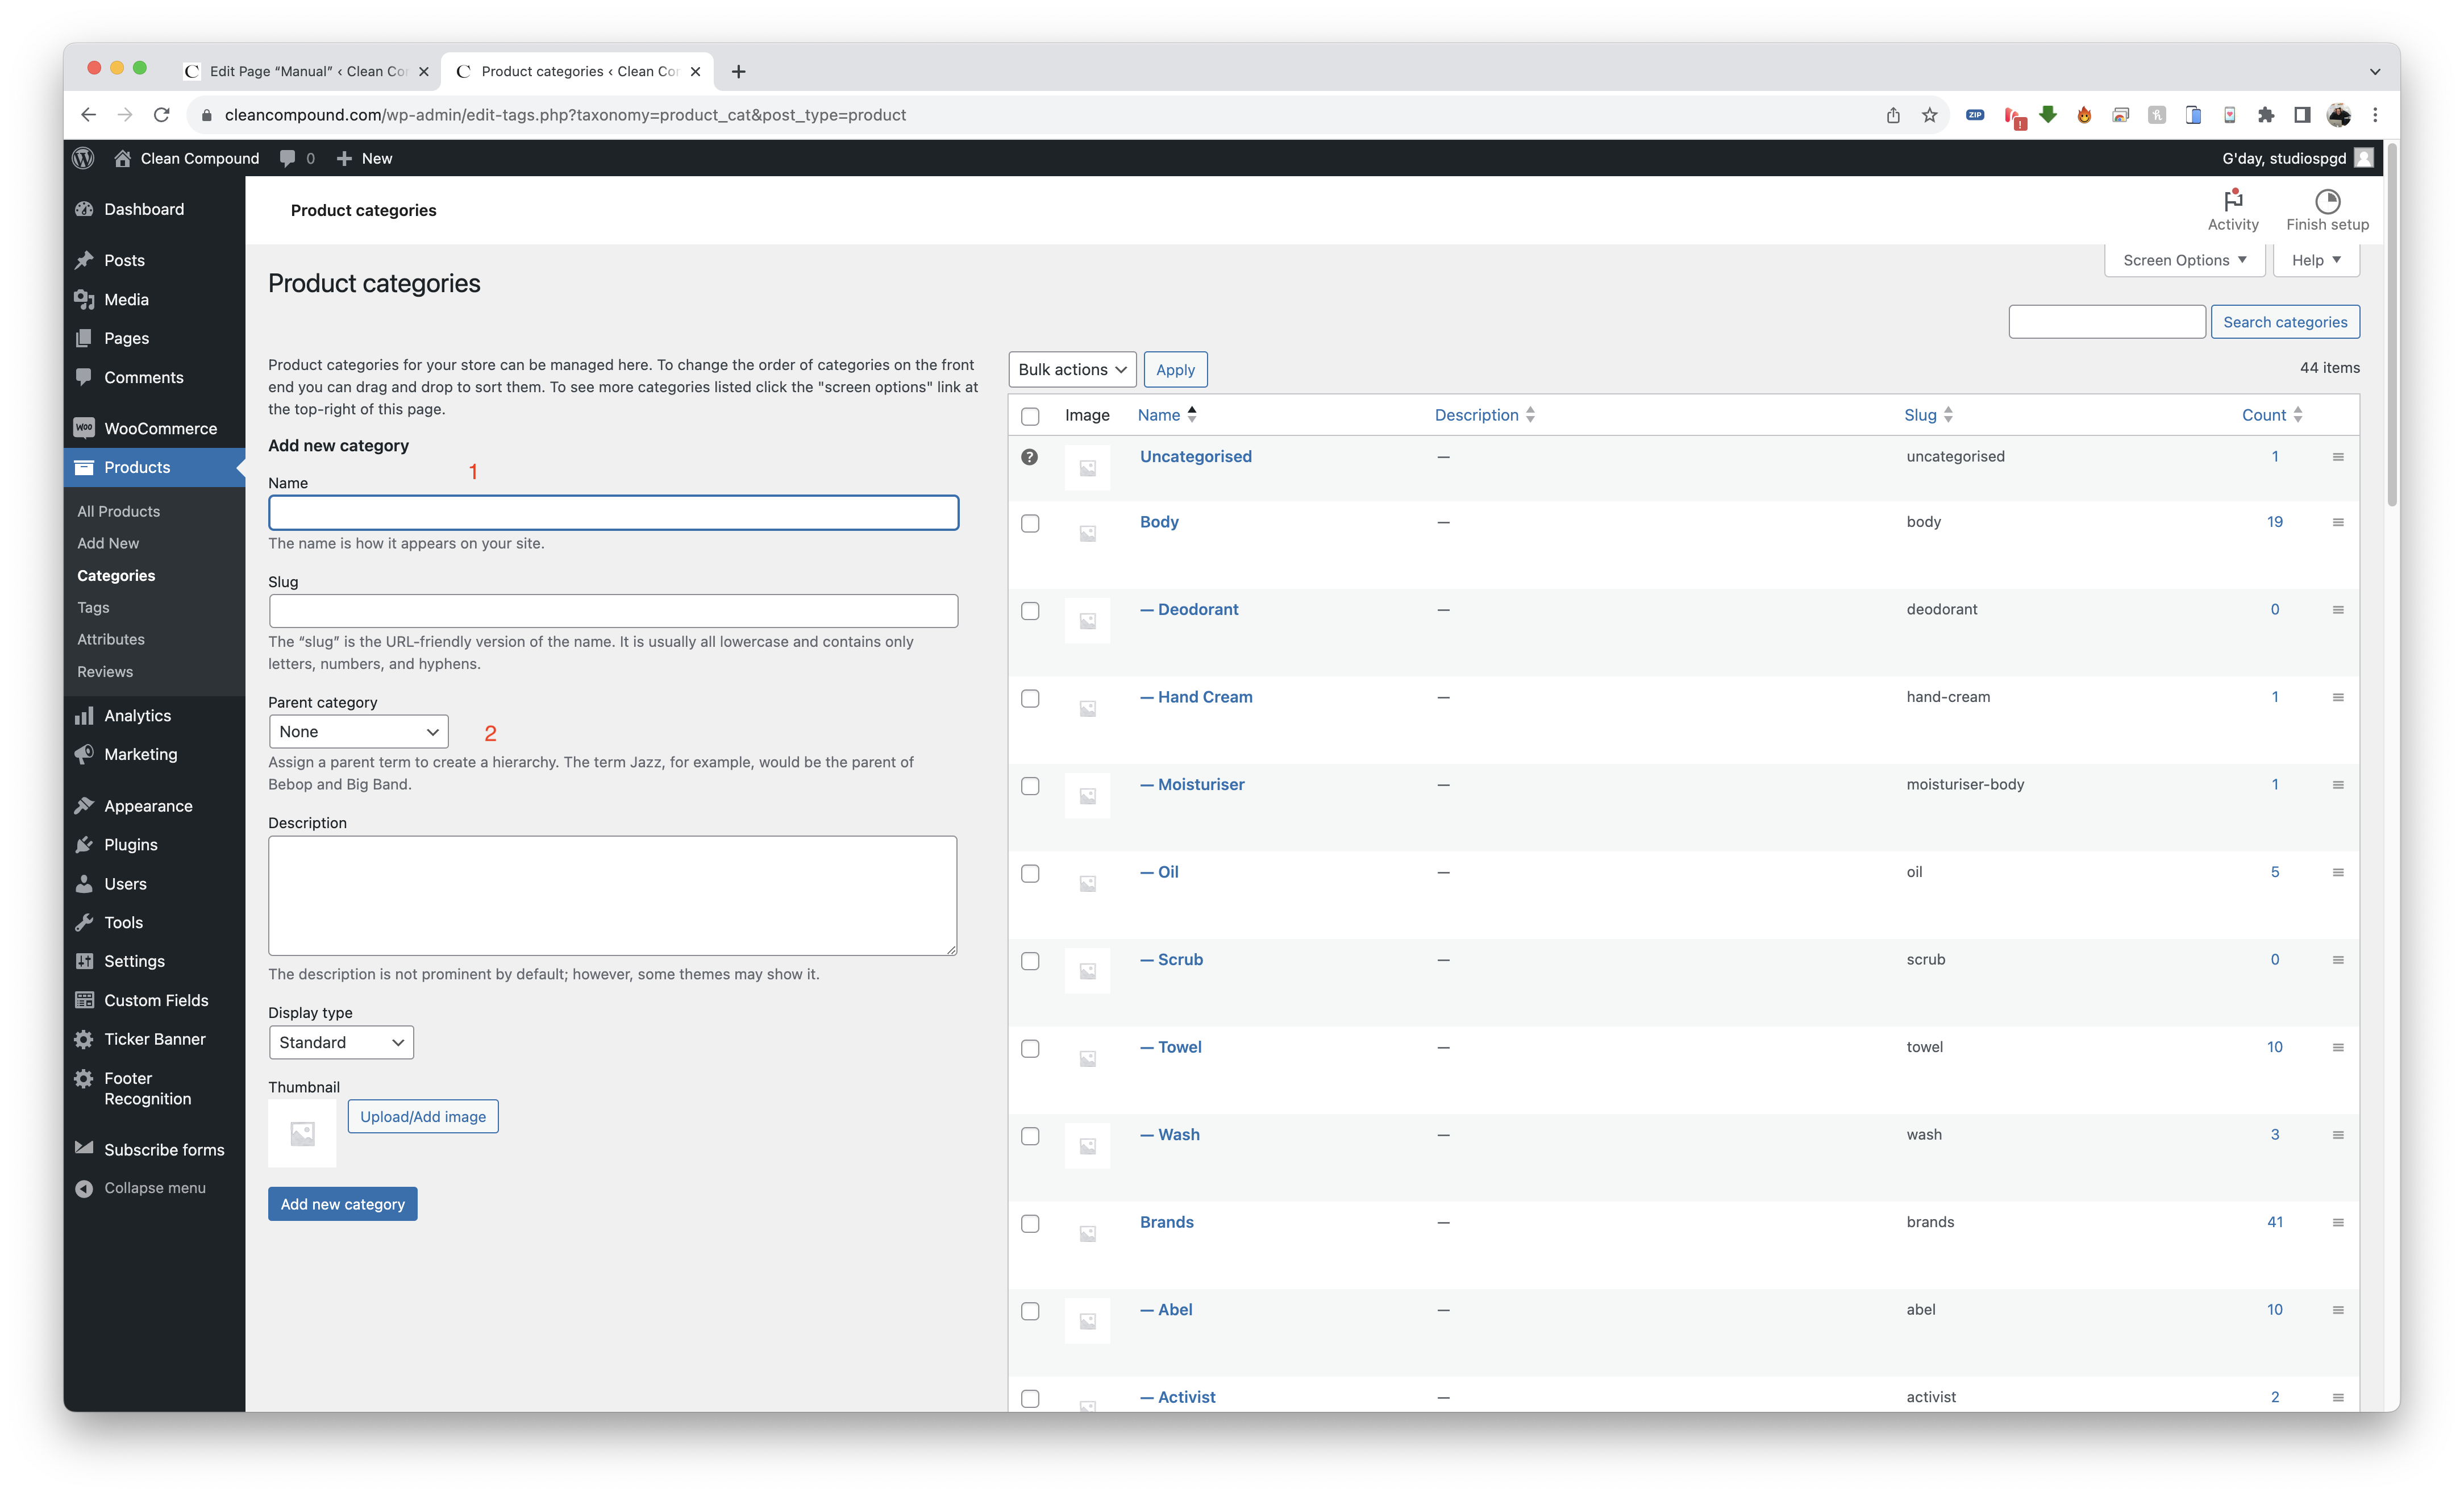
CATEGORIES this is where you add product categories before you can assign the product.
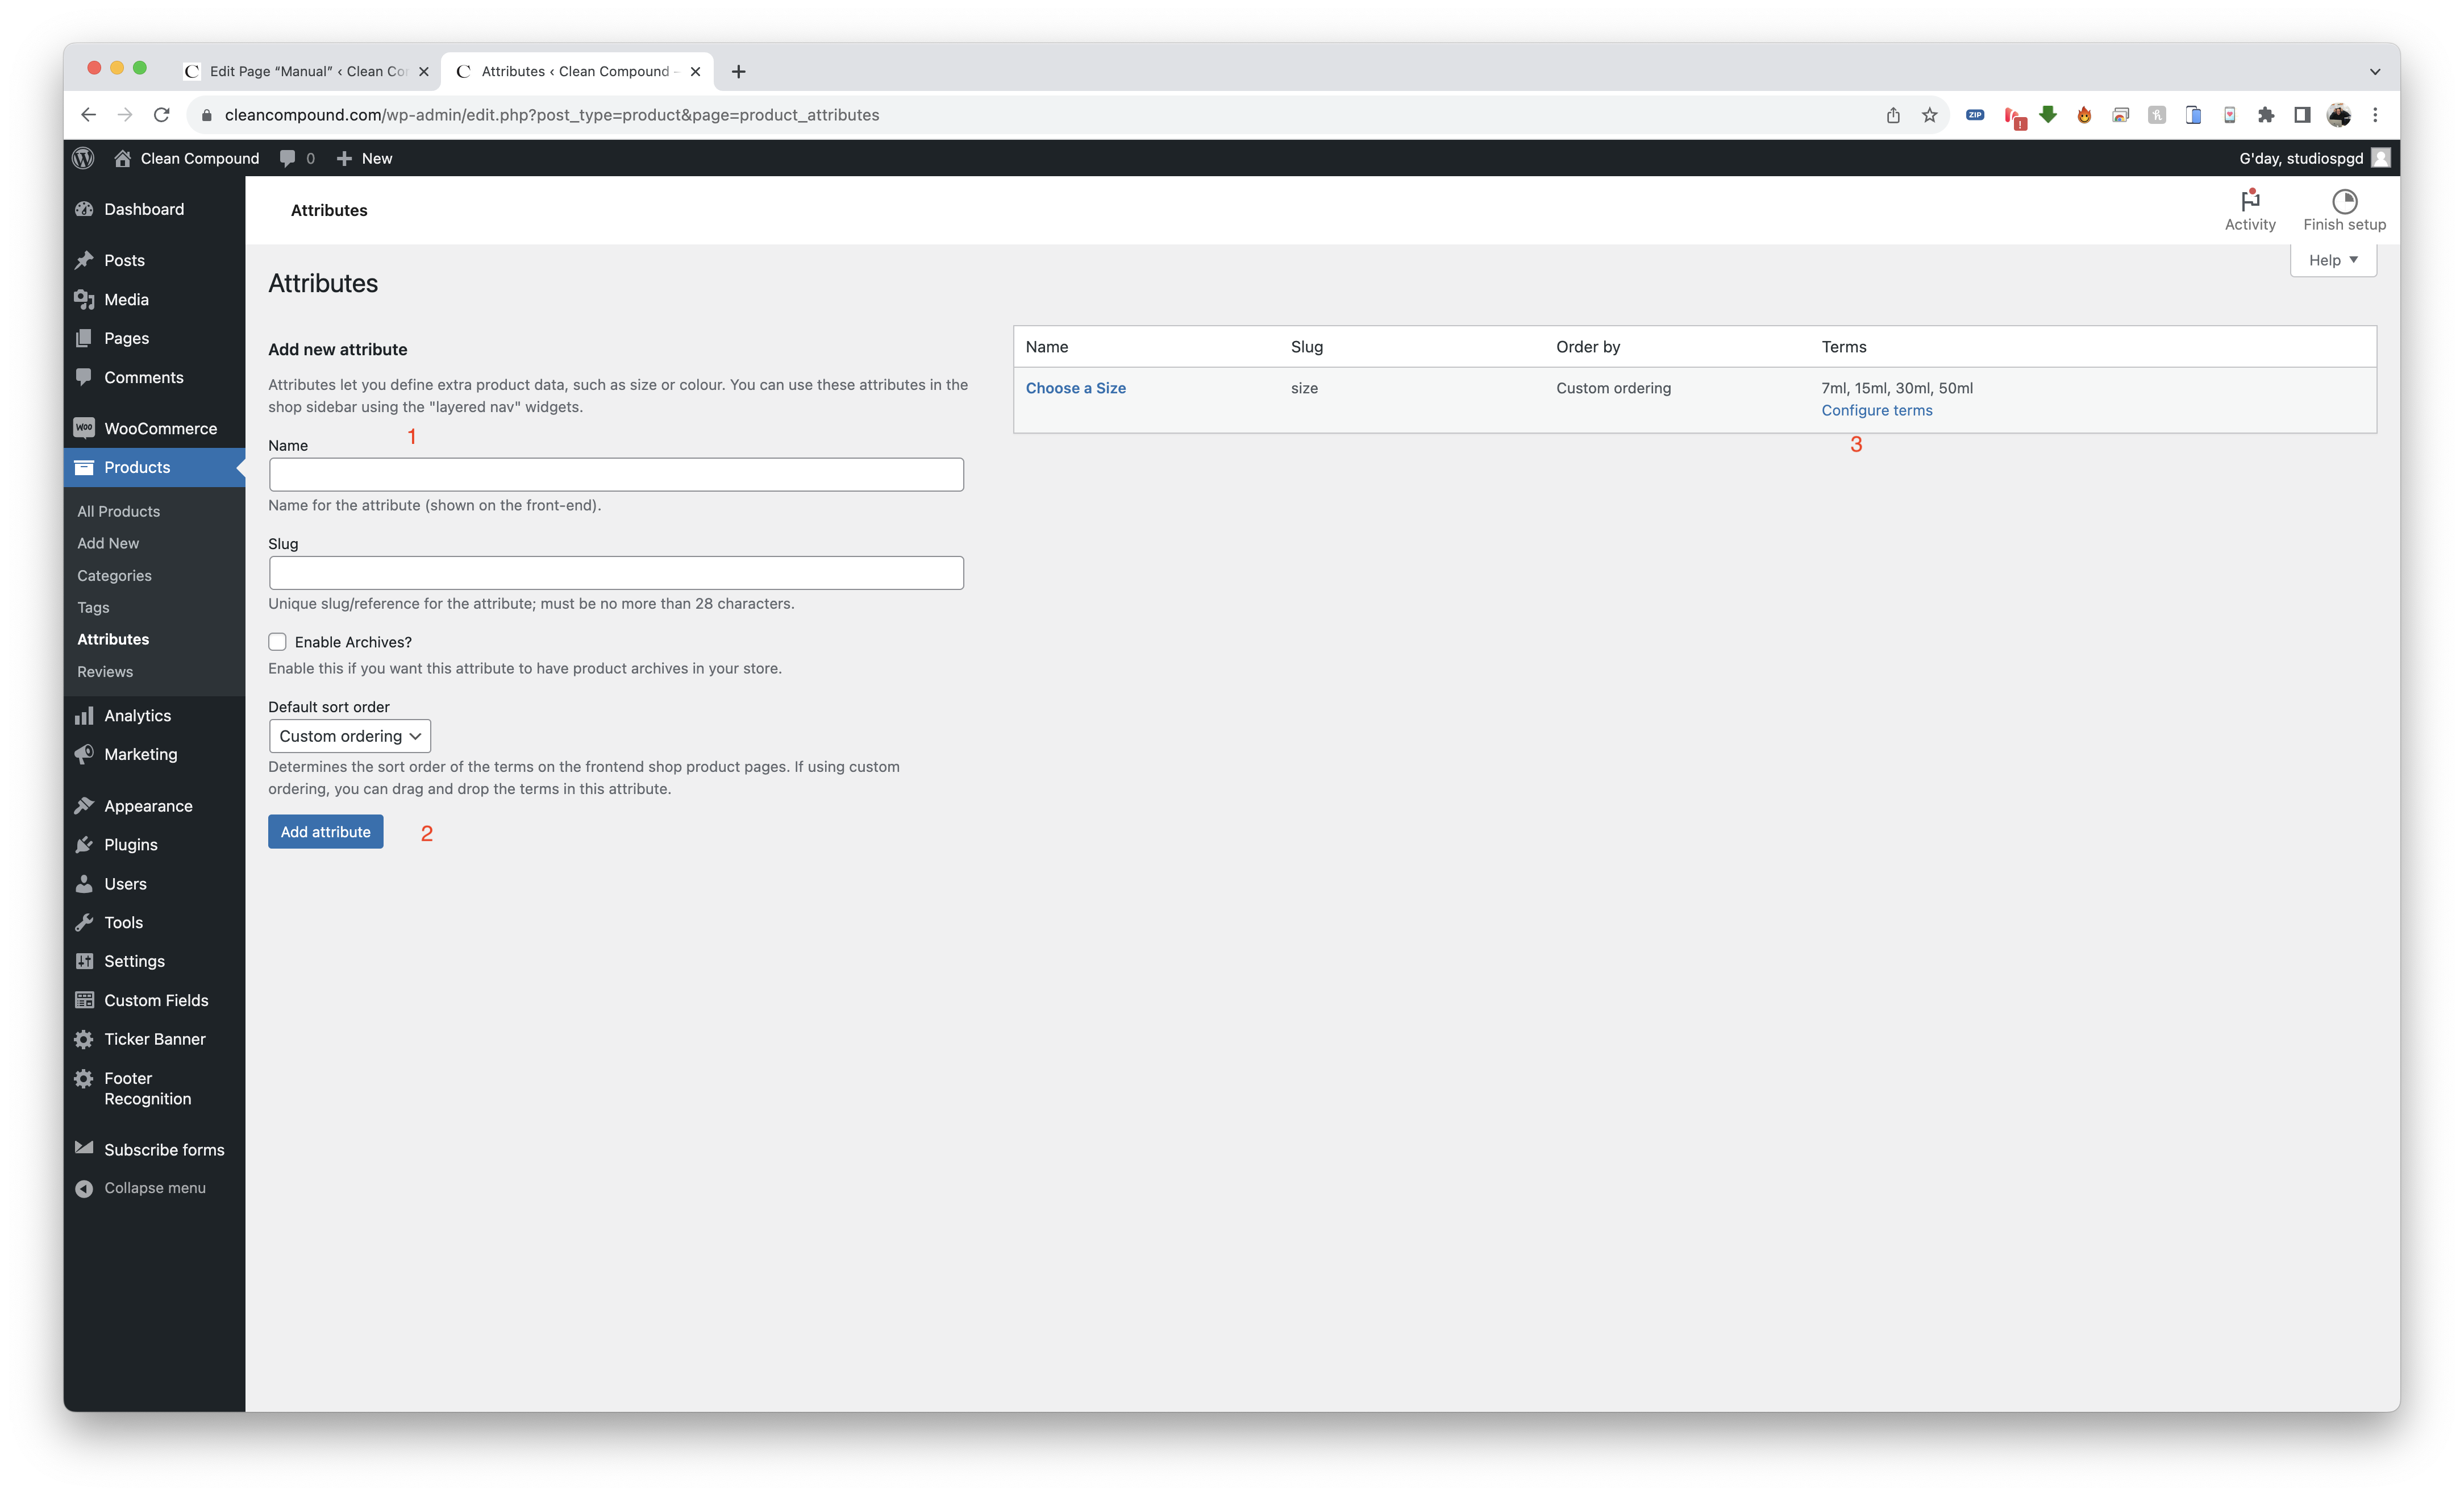
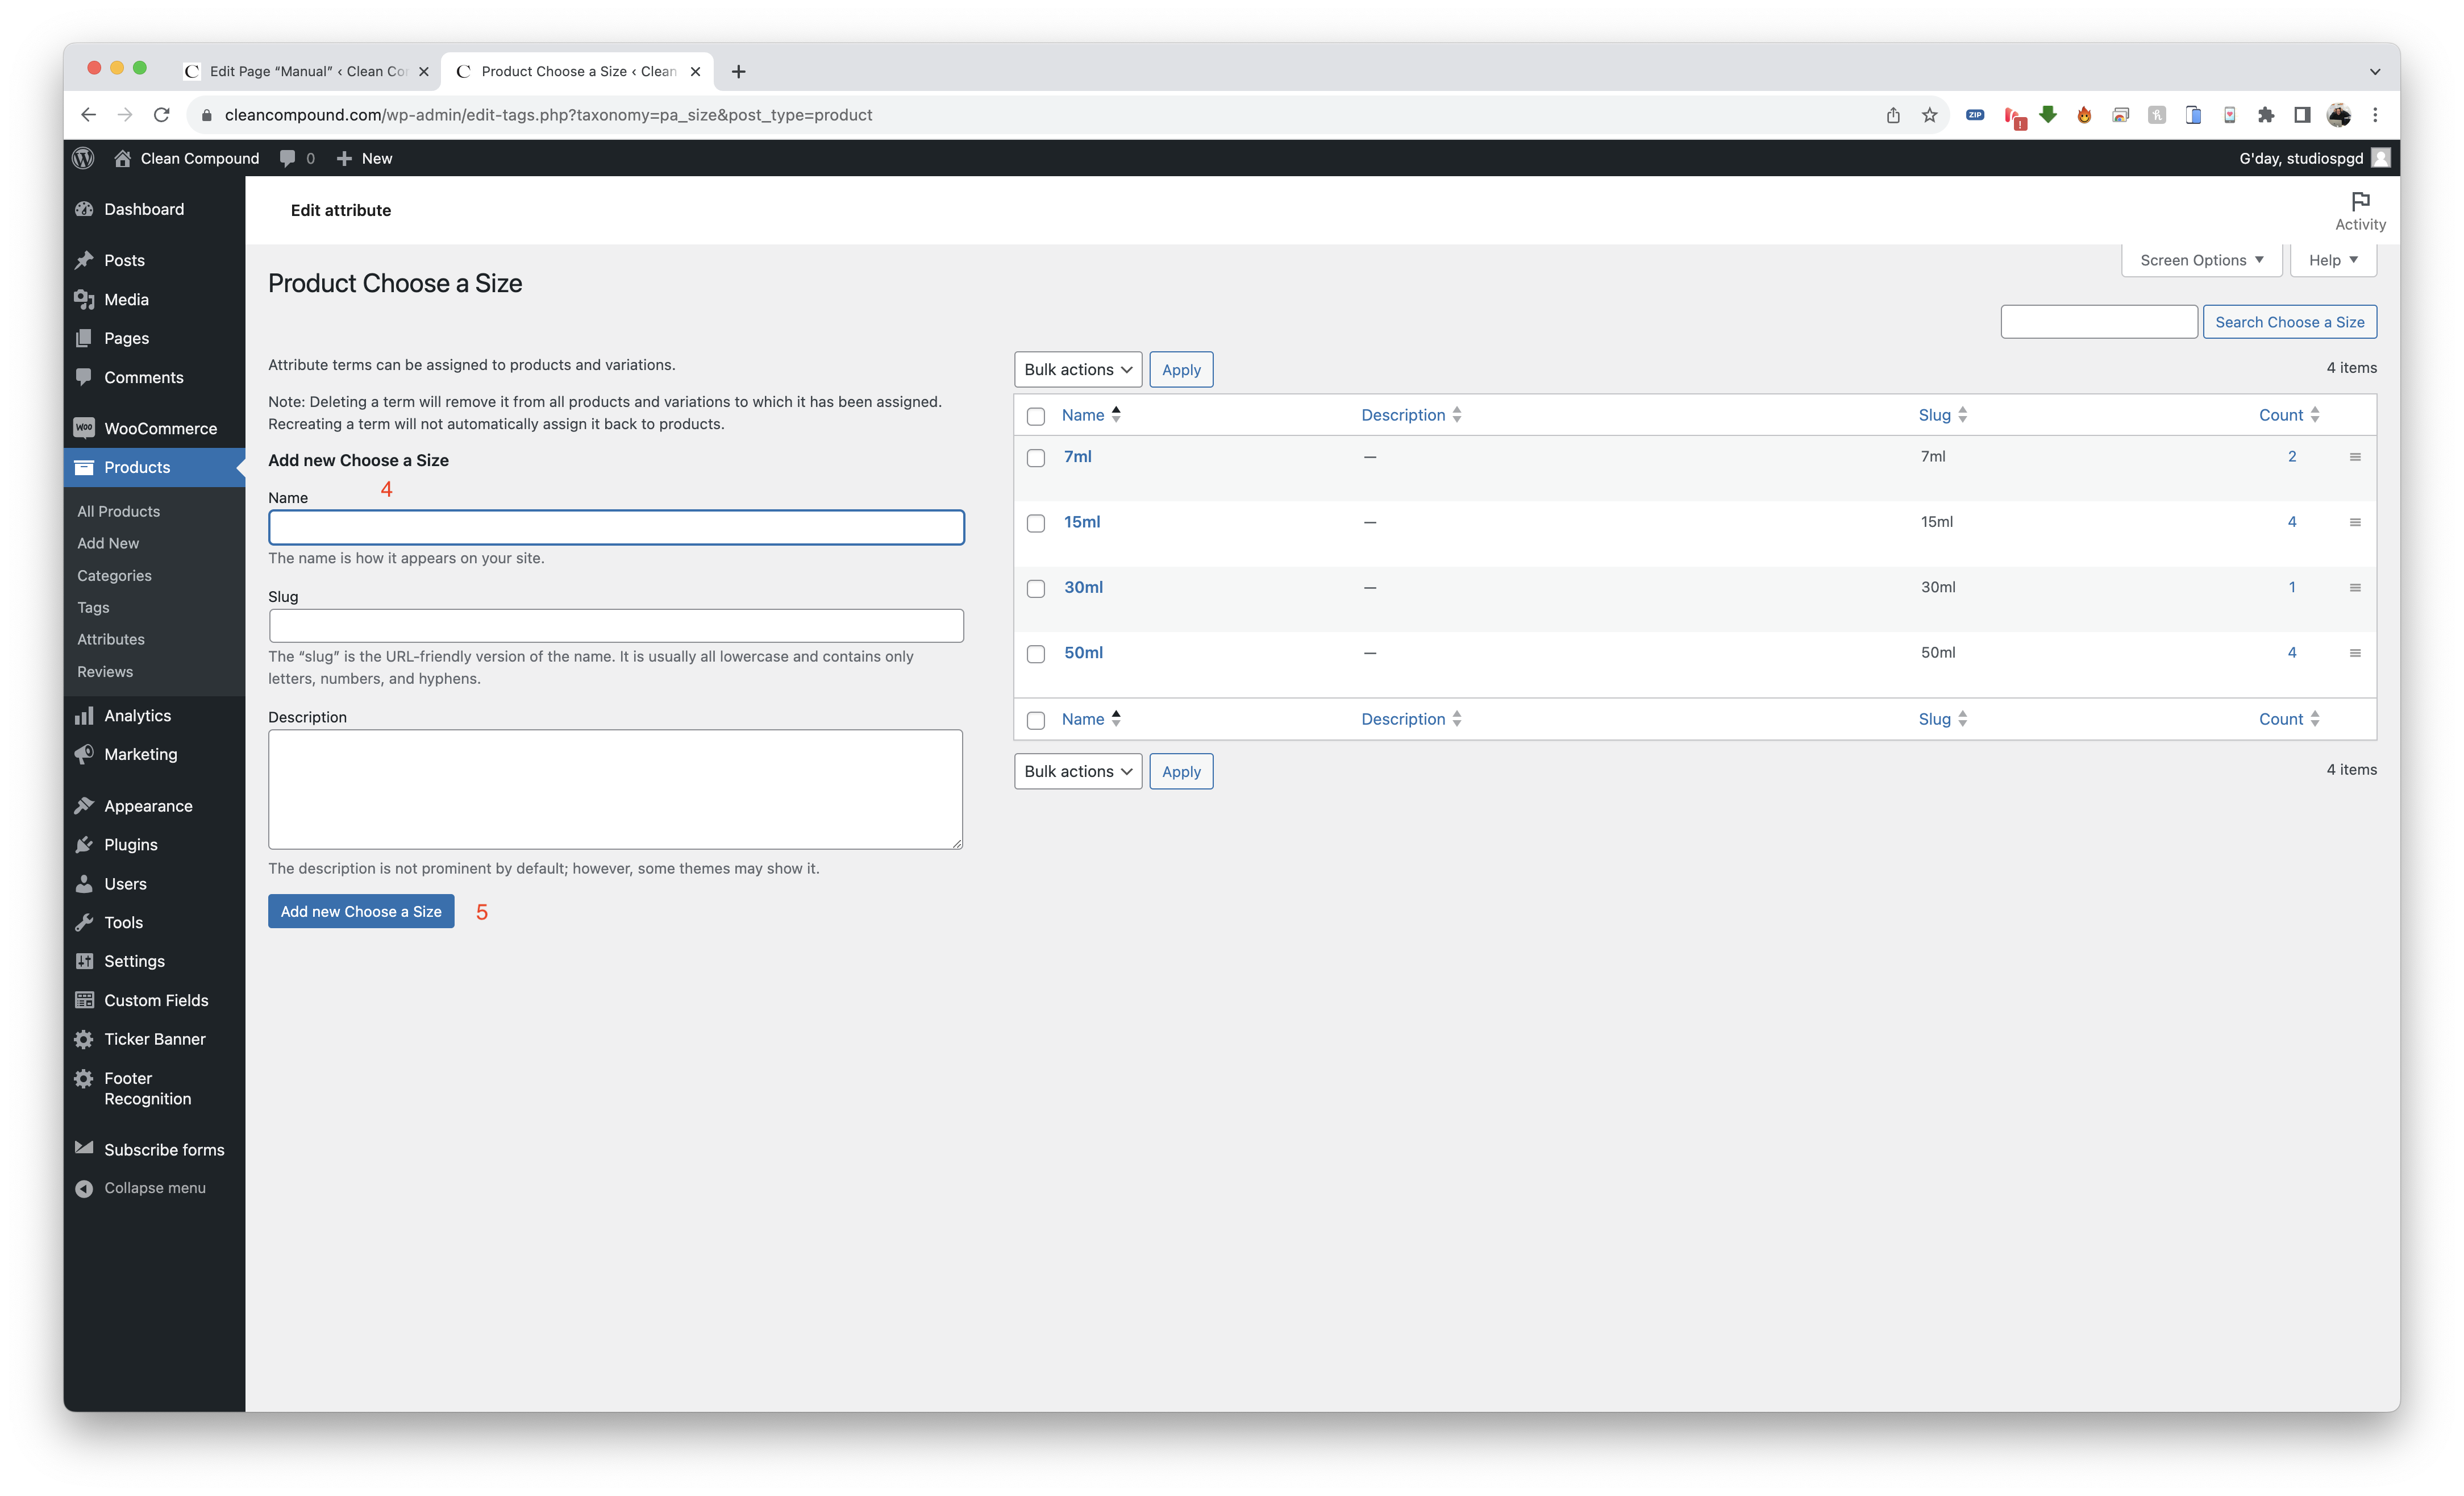
ATTRIBUTES this is how variable products gets their variations. you need to create the attributes first before creating variable products.
save the terms |
SIMPLE PRODUCT |
|
|
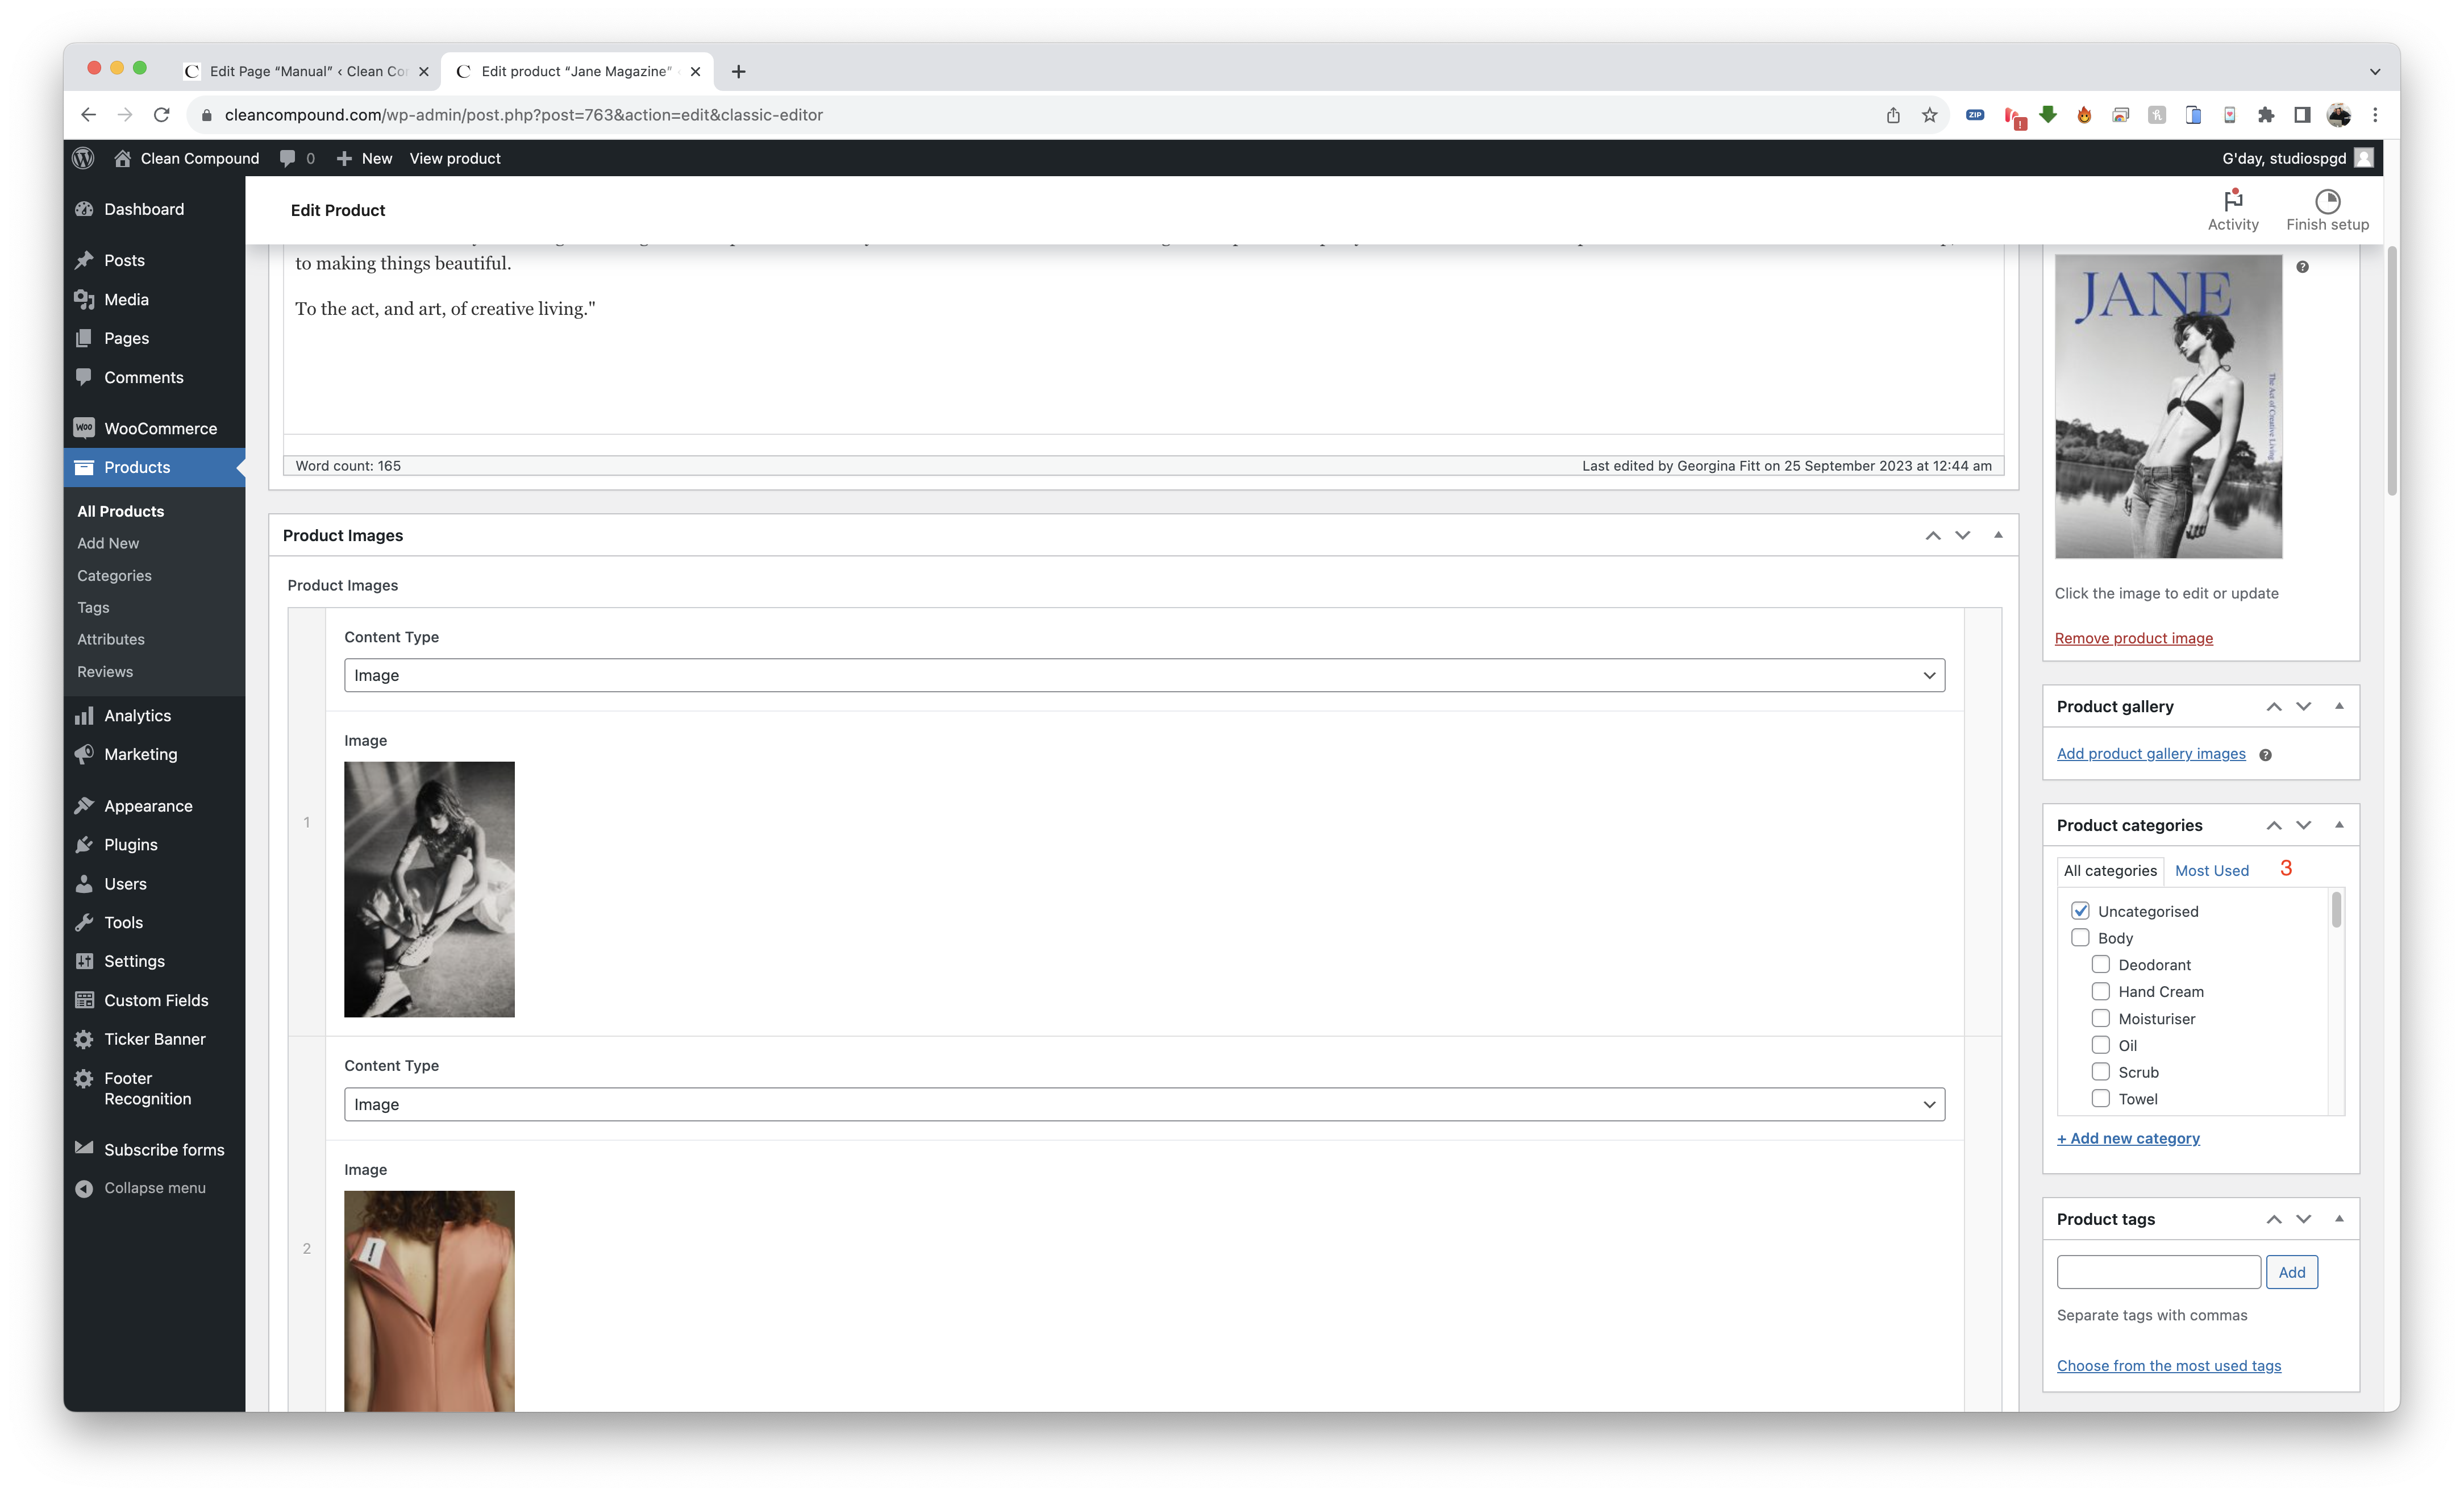
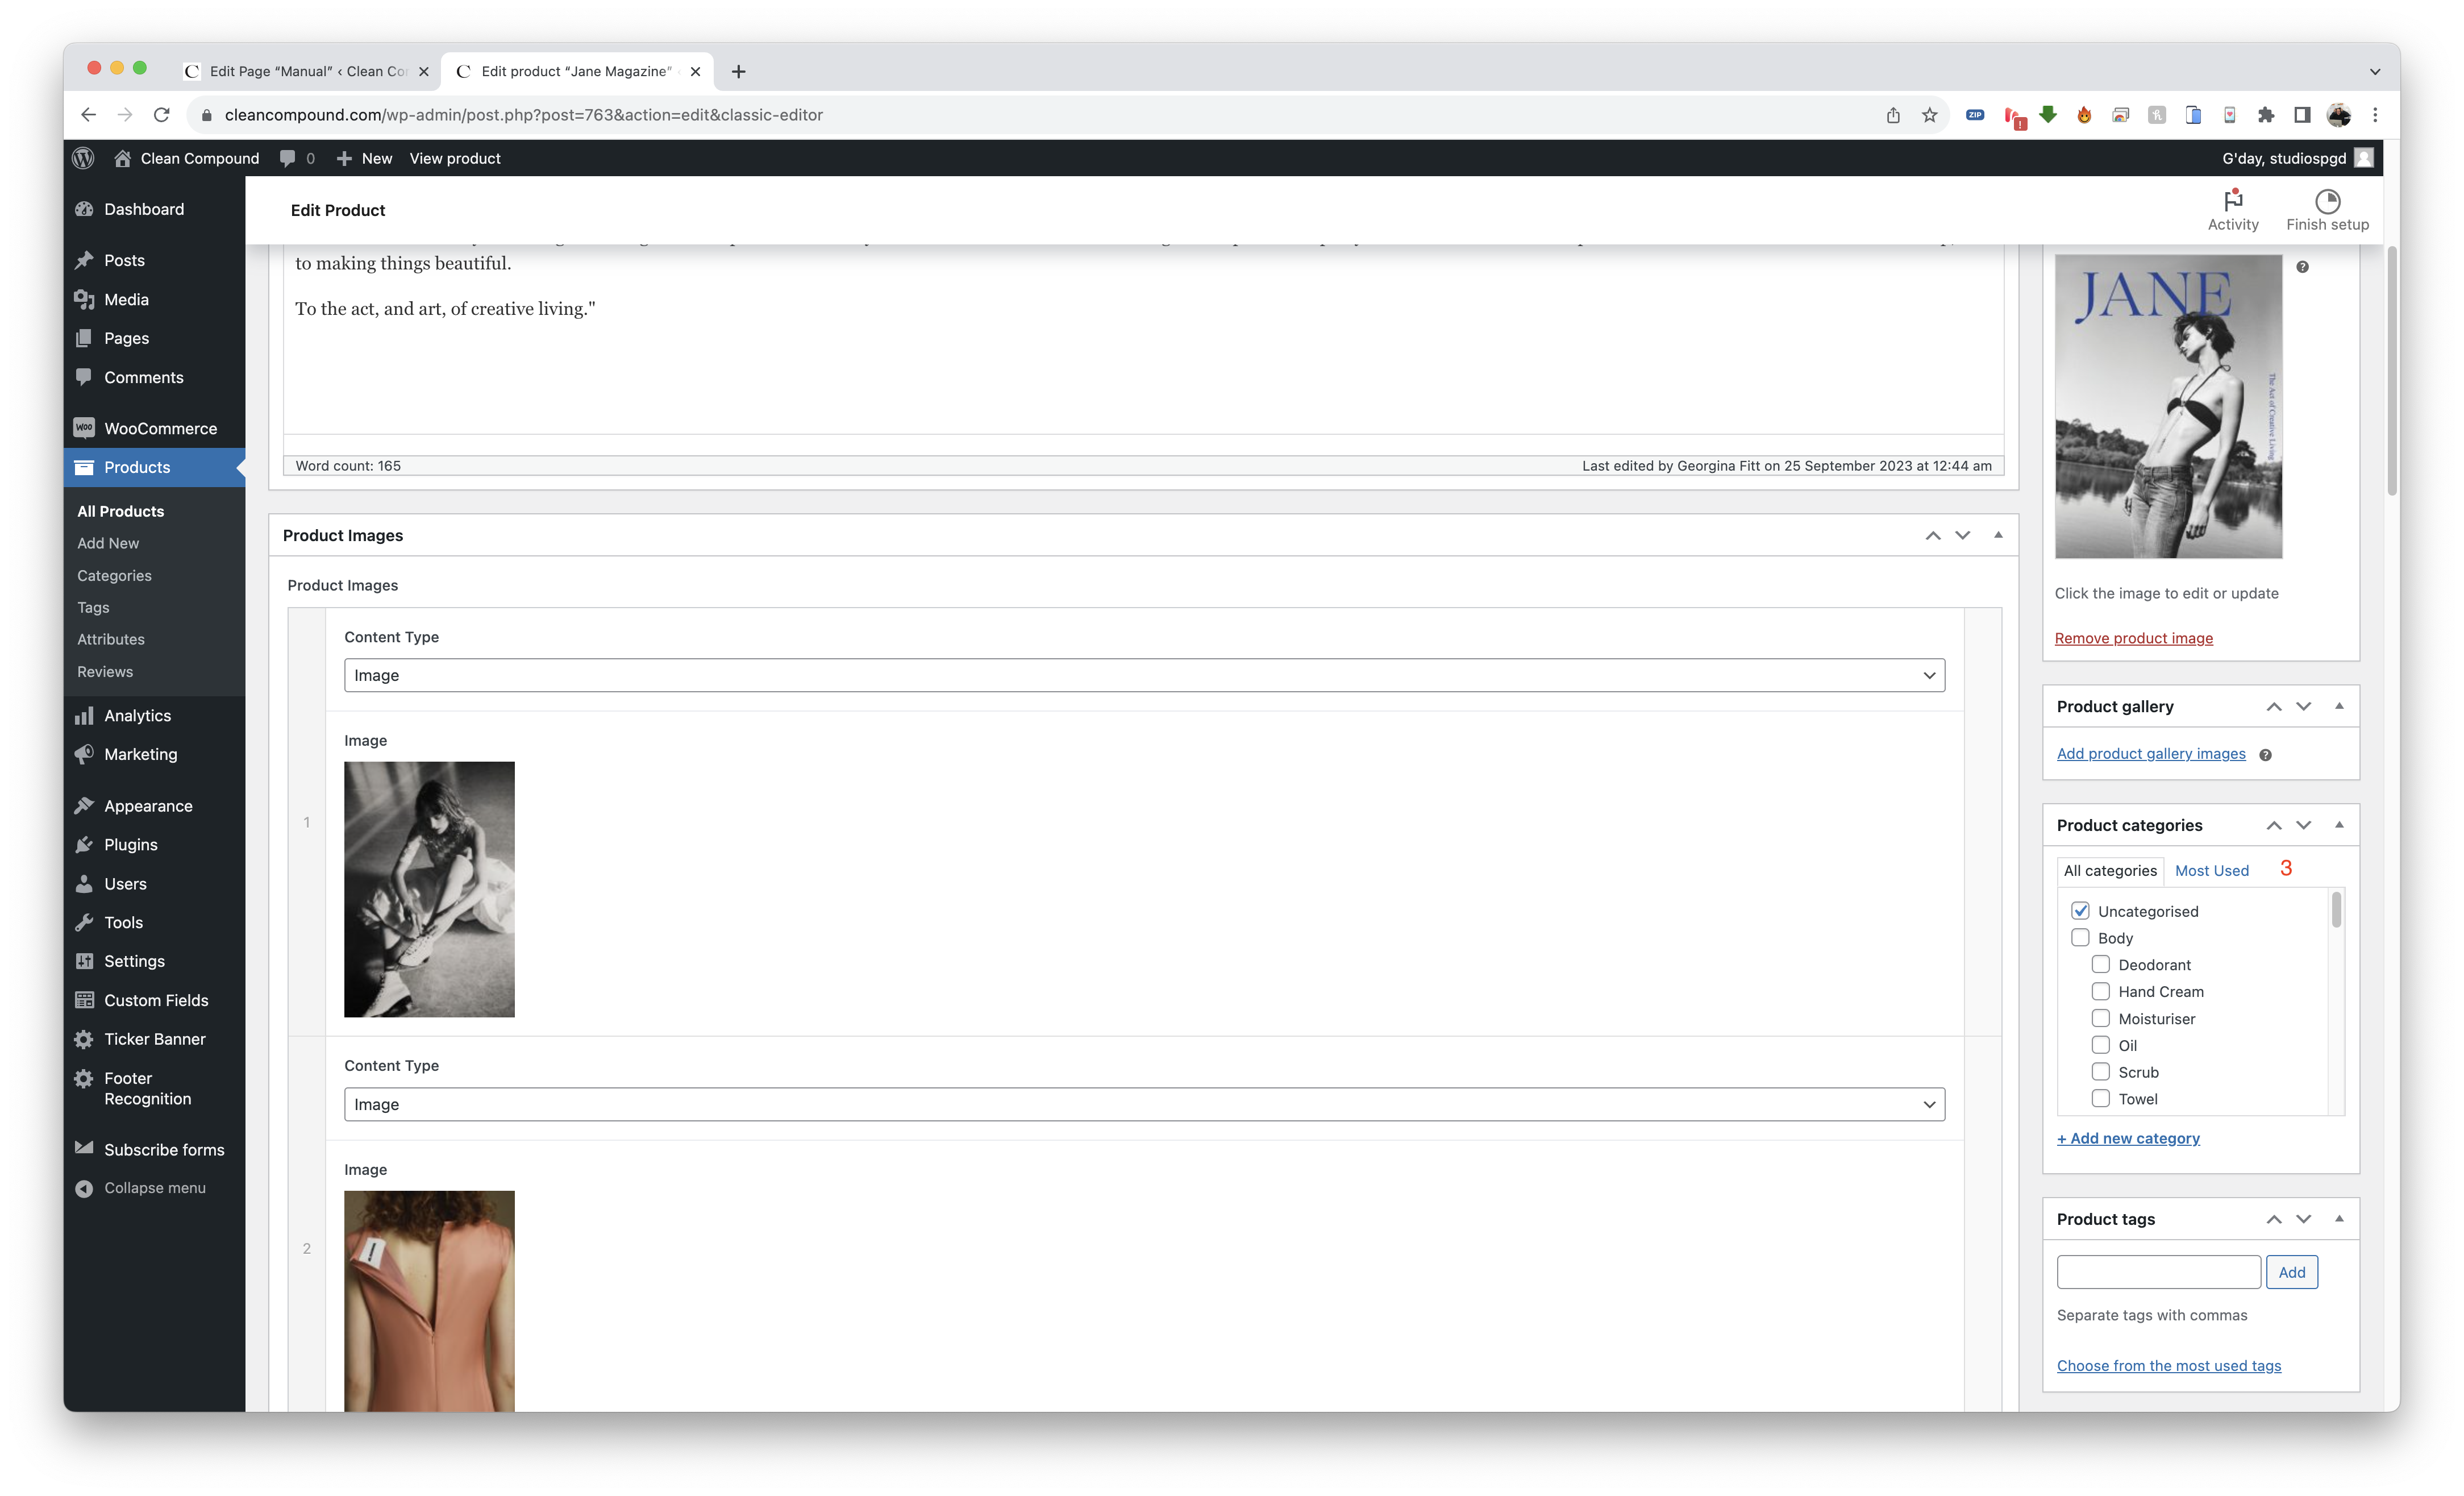
To add new simple product click Products > ADD NEW
once done click publish or update on top right |
VARIABLE PRODUCT |
|
      |
The steps from simple product from #1 – #14 applies here too. the difference will be in the product data
repeat step 8-10 for all variations generated CLICK PUBLISH OR UPDATE ONCE DONE ON TOP RIGHT |
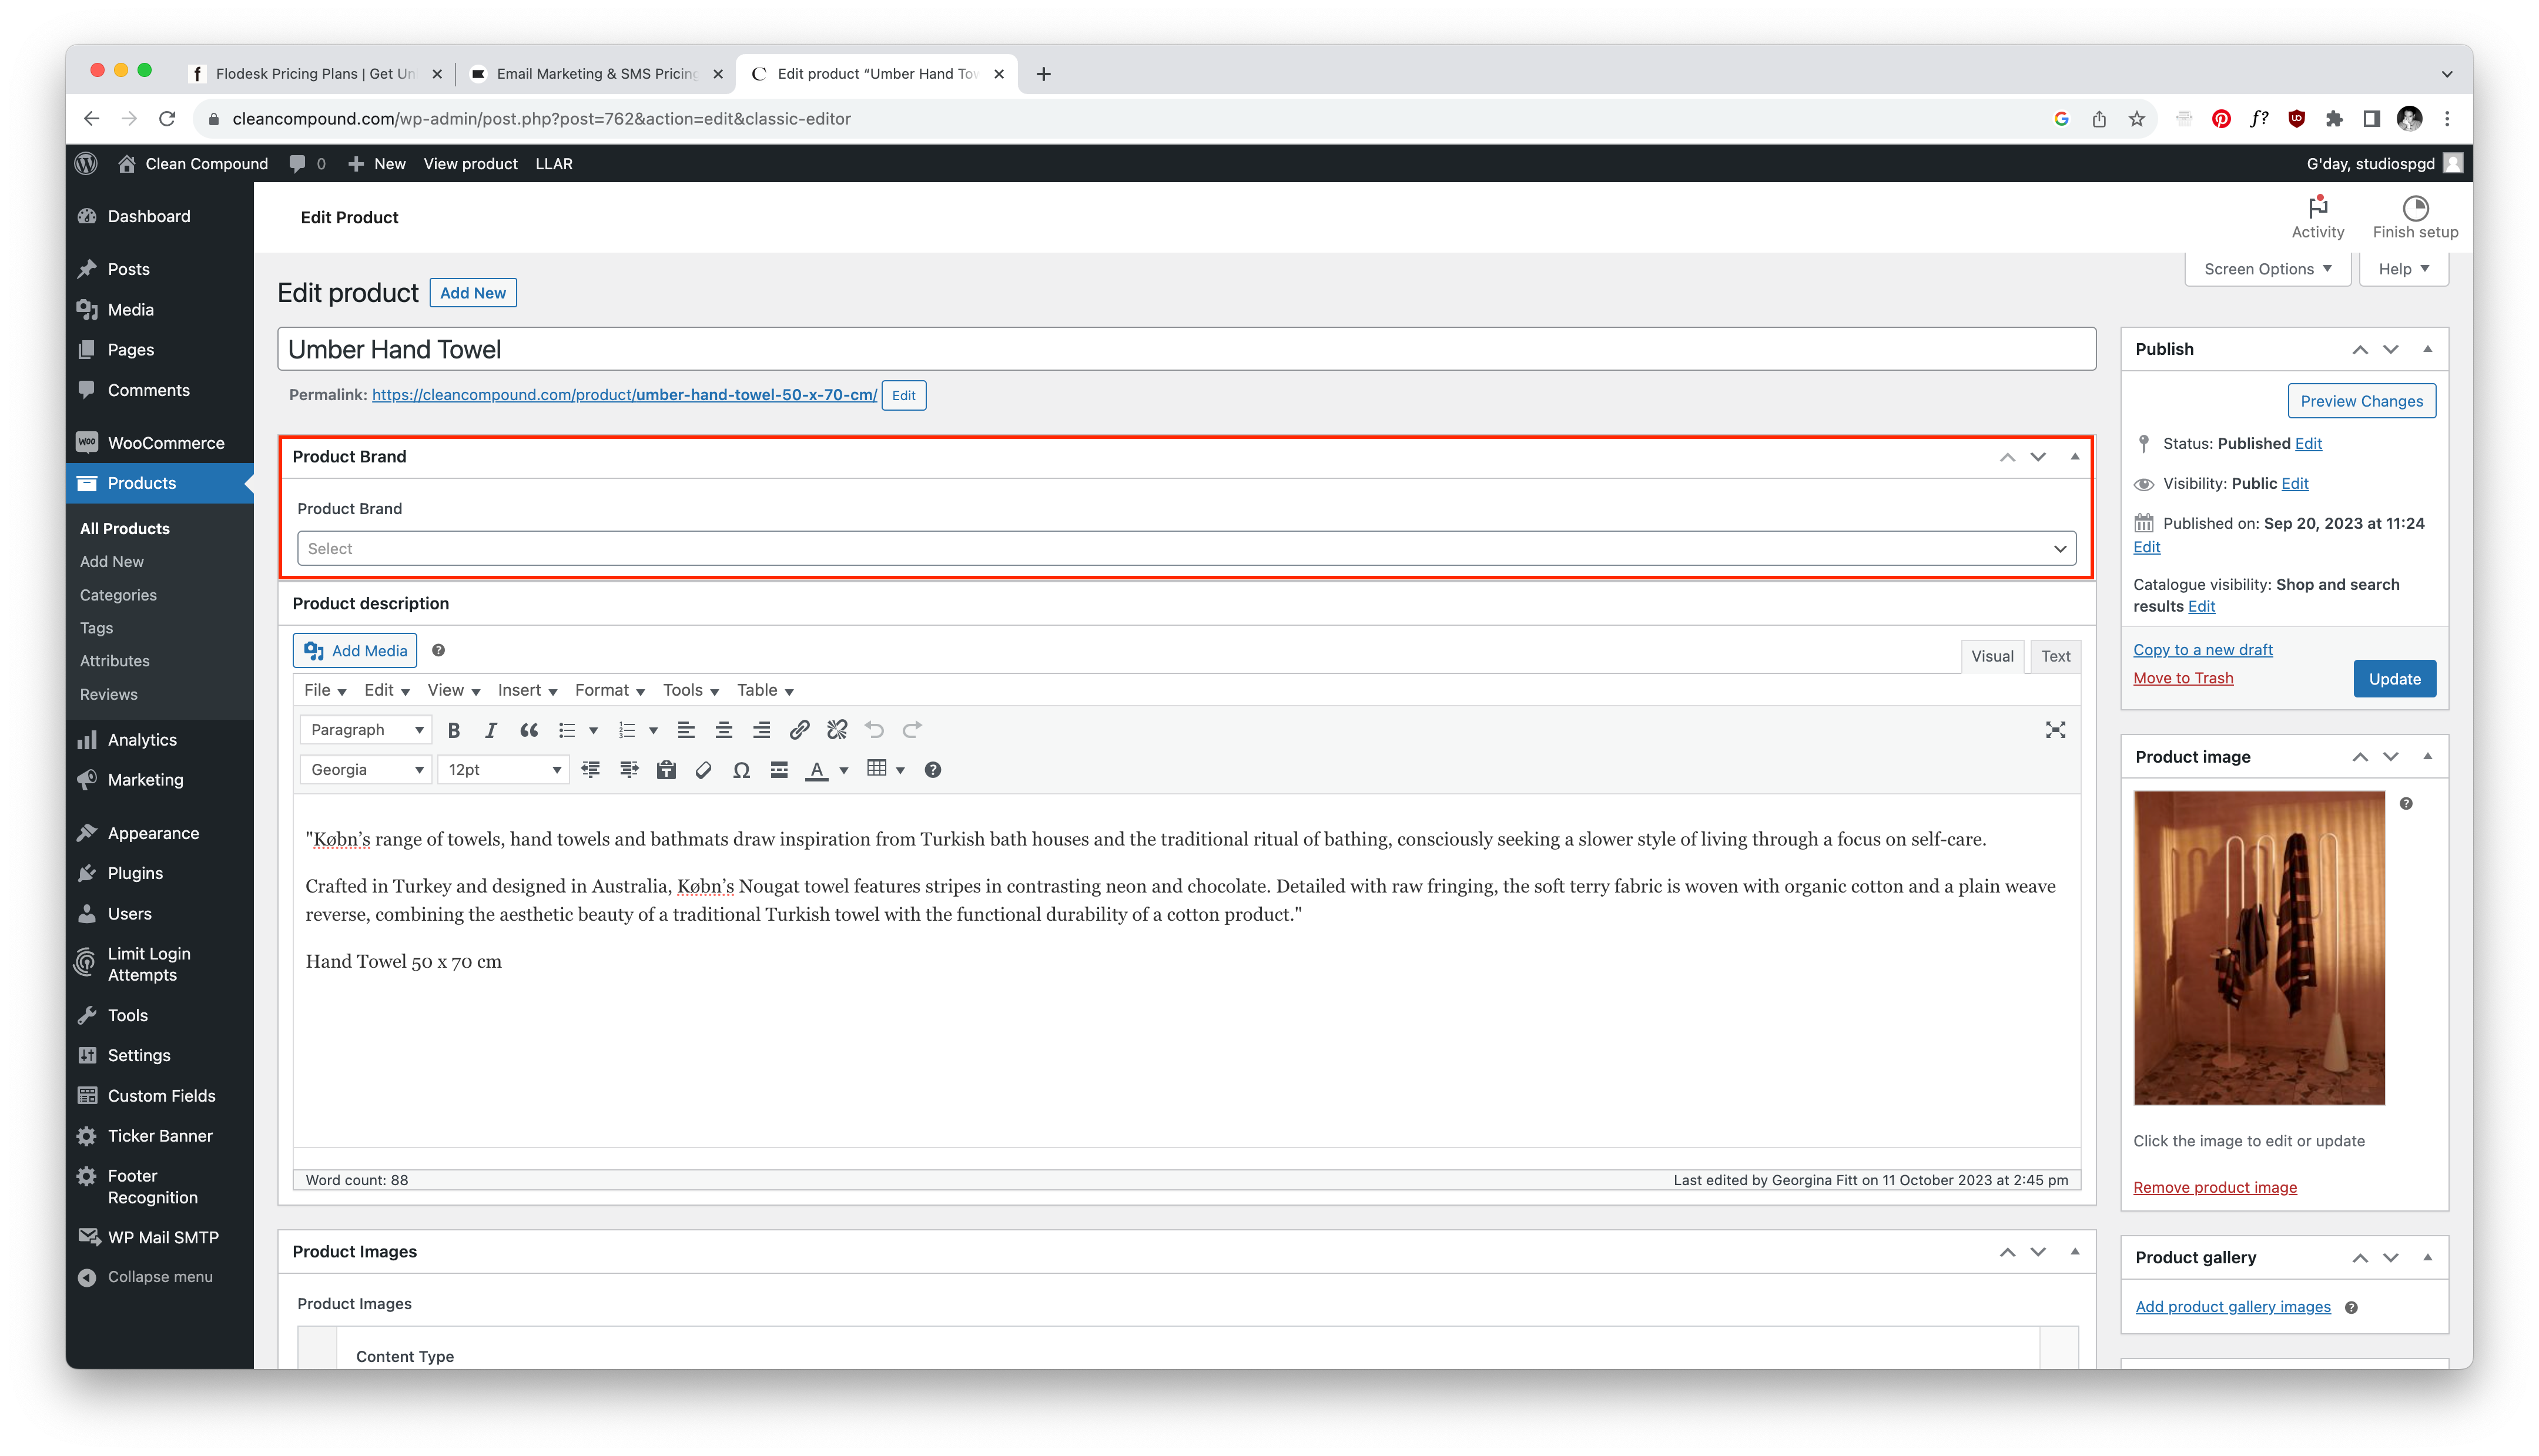 |
NEW addition: inserting product brand in product pageunder the title there will be a drop down where you can choose which brand is the product belong to, and can be displayed in the product page, visitor can click this to be taken to the brand page as well. to add this, just simply select the product in the drop down in the PRODUCT BRAND section in the back end as per screenshot. |
ORDER PROCESSING |
|
  |
By default all new orders will show up as PROCESSING. this is so that shop owner have full control whether the sale is final or not. to change this status navigate to WOOCOMMERCE – ORDERS
enter the order
|
Shipping Method |
|
| To update shipping, navigate to WOOCOMMERCE – SETTINGS – SHIPPING tab
there are two zones we have created for the shipping: AUS and LOCAL. Local is for victoria only, while AUS covers the rest of Australia
To add free shipping, follow the steps below:
|
|


